


Category Archives: Help Desk Modules
Macros Attachment Module
Tired of adding attachments manually? Our brand-new module will help save your time. Macros Attachment module extends macros functionality and simplifies attachments adding process, using macros to attach files with macro automatically.
Admin CP
1. To install the Macros Attachment Module in the Admin CP choose Apps →Macros Attachment.
2. Click on the Install button under the Macros Attachment tab.
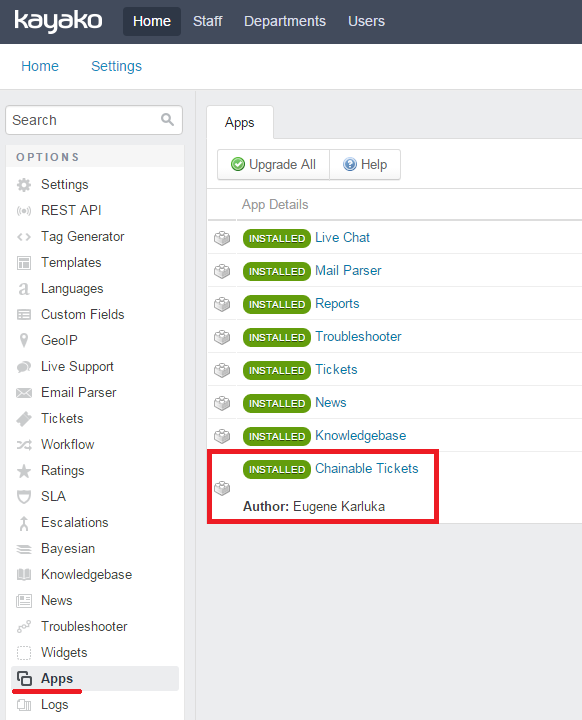
3. You will see that the app has been installed successfully.
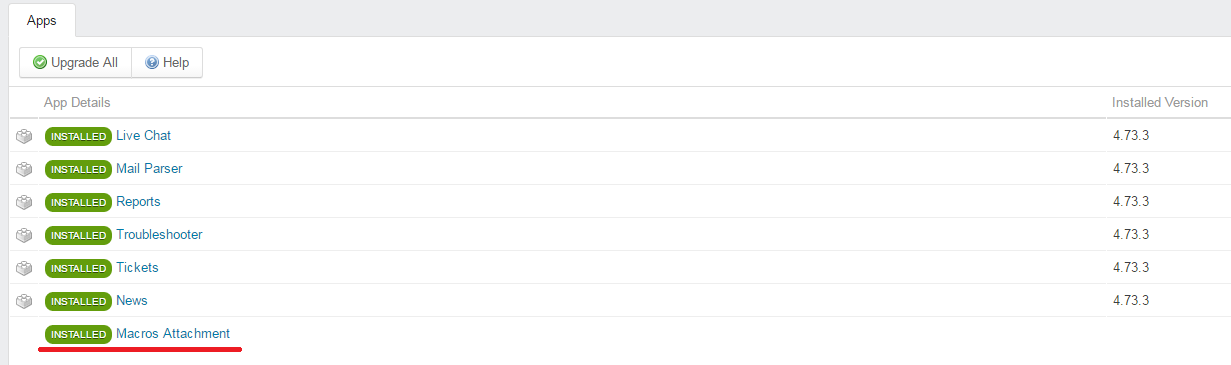
The Apps tab.
Staff CP
1. Go to the Staff CP, choose Tickets →Macros.

The Tickets and the Macros tabs in the Staff CP.
2. Click on the Macros tab and select the macros you need, or create a new one. We need the “macro1”.
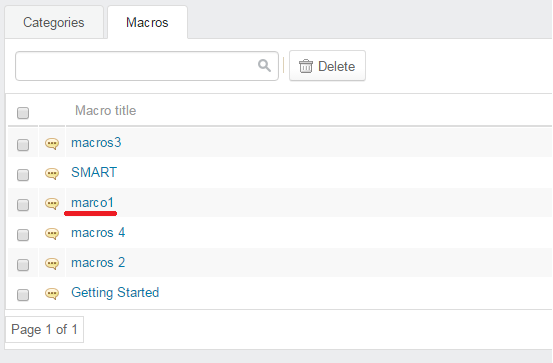
The Macros tab in the Staff CP.
3. Click the Attachments tab. Now you can upload all files you need. Don’t forget to click the Save button.
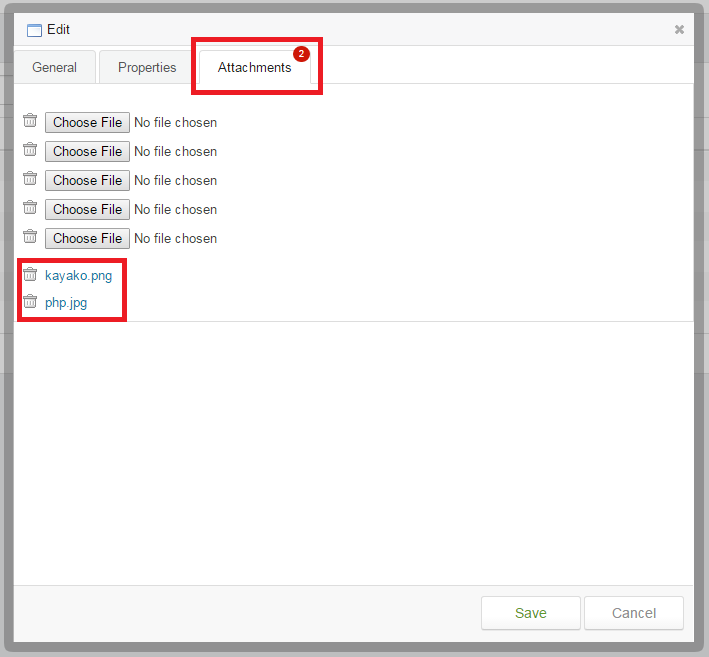
The Attachments tab of the Edit window.
4. Now you can attach files very quickly during a new ticket creation or answering the old one. Just choose macro you need and program will attach to the ticket all files you uploaded to the macro earlier.
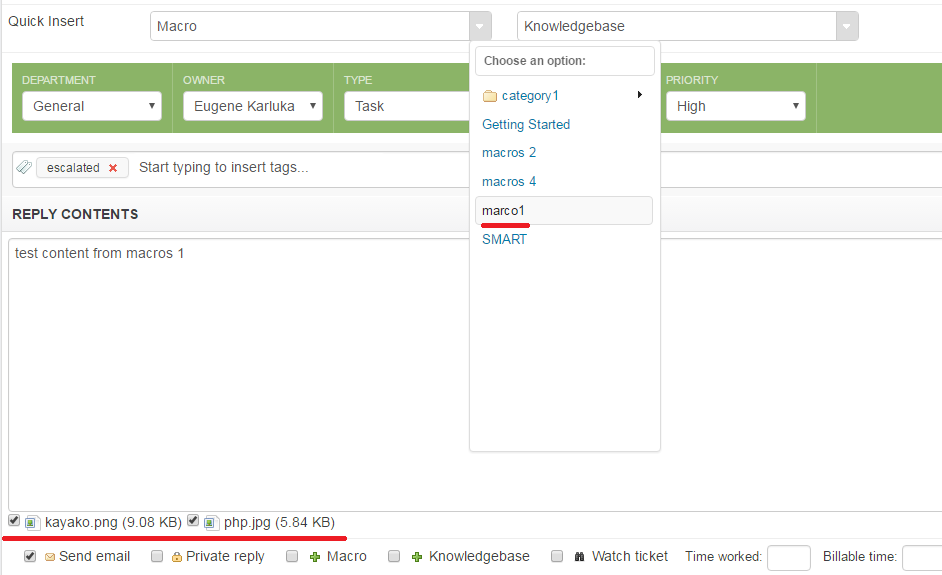
Files attached to the letter using macro.
Please, check out the demo here:
Staff CP: http://kayako.holbidev.co.uk/macrosattachments/staff/
login: admin
pass: 111111


Chainable Tickets Module
Streamline your work-flow with our brand new module! Now using Chainable tickets you can create a child ticket from every ticket in Kayako.
Chainable tickets
1. Setting process is standard. Go to the Admin CP, choose Apps in the side bar menu, click the Install button next to the module’s name.
2. It is possible to create a child ticket from every ticket in Kayako. For these purposes in the standard button row (update, add note, etc.), we have added the Create Child Ticket button.
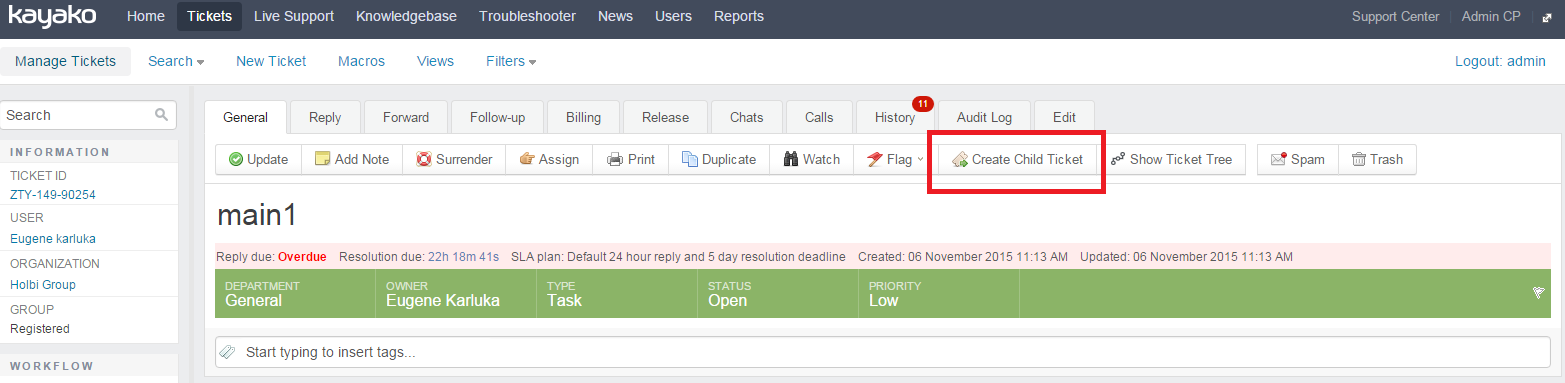
3. Once this button is pressed, Kayako creates a new ticket with a link to a parent one.

4. There is a special screen for all tickets in chain, click Show Ticket Tree to view it.
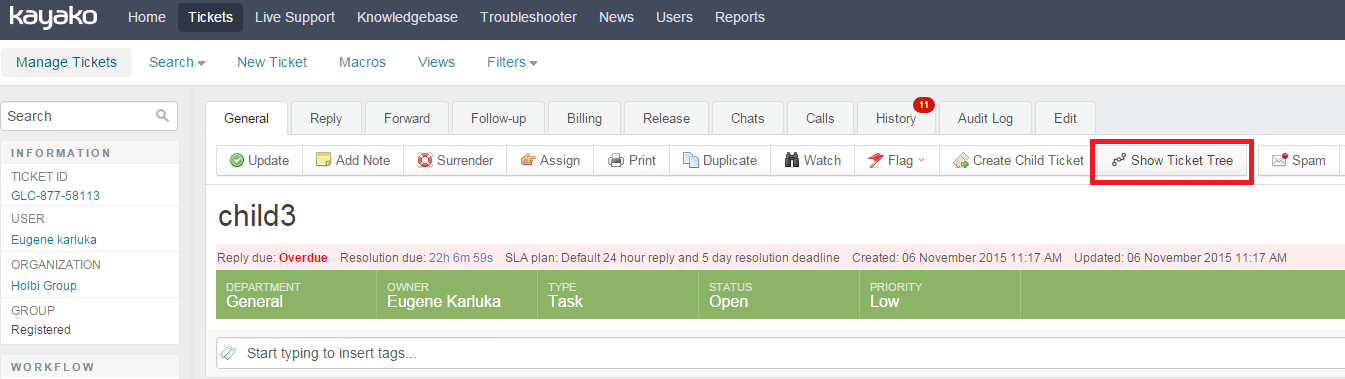
The screen displays the tree with all the ticket IDs linked to tickets and their statuses.
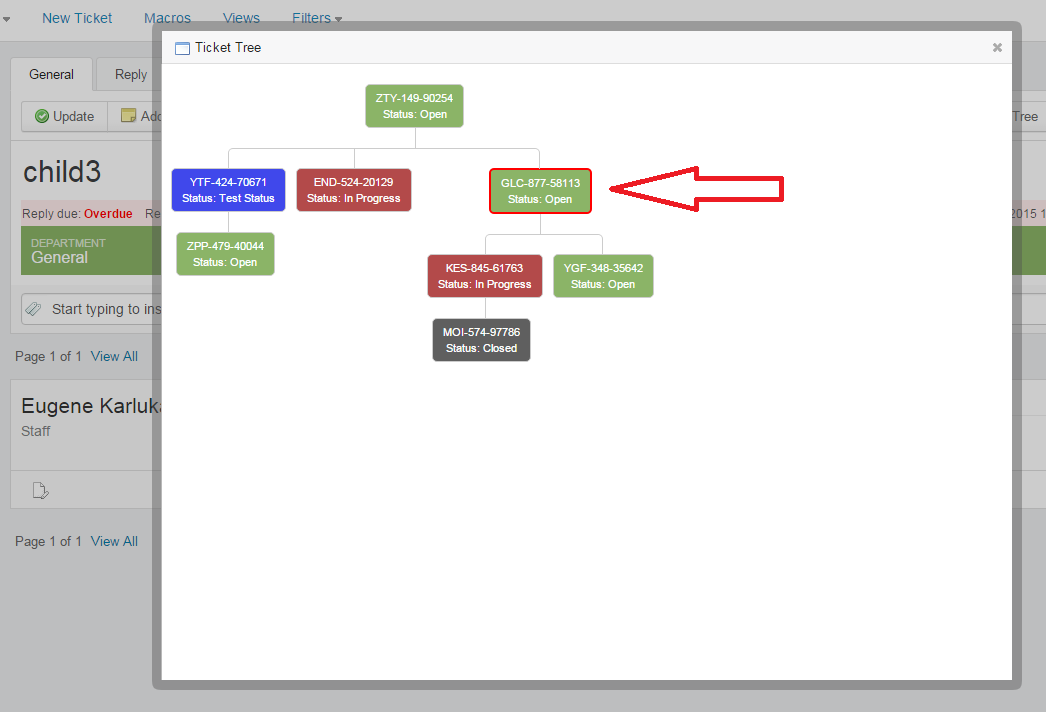
All the nodes of the tree have color of a current ticket status.
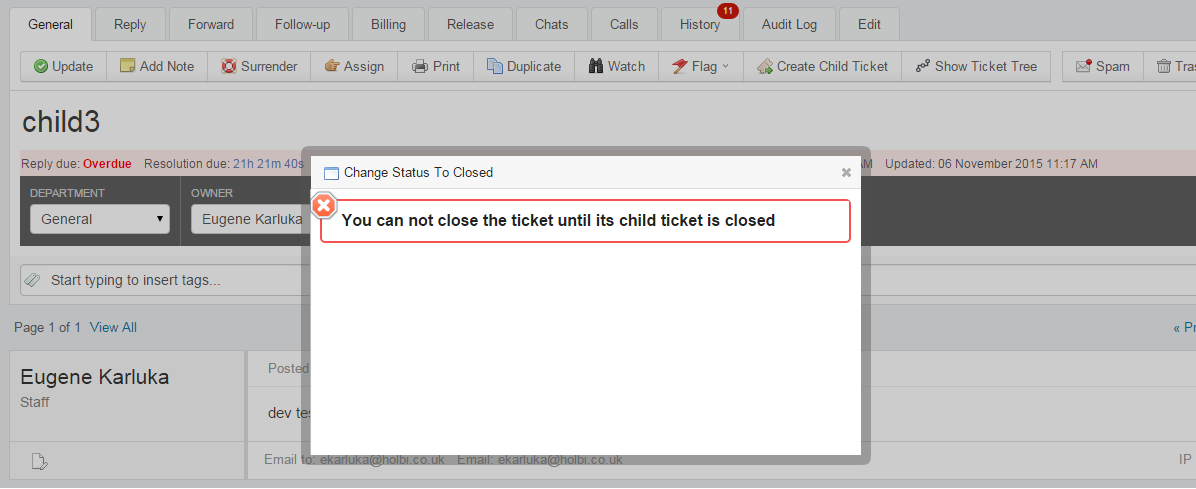
Note: It isn’t possible to close the ticket (status with property “resolved”) unless all child tickets are closed. If a Staff member tries to close the ticket which is in chain, the error message will be displayed.

Watched by me
Optimize your time using Watched by me module! Now each staff can create the watch list to get an overview of all tickets he is “watching”.
Watched by me
1. Now Quick Filter has a new item called Watched by me (you can find it under My tickets).
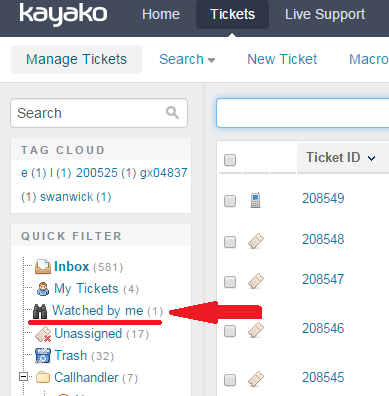
When you open this section, it displays tickets followed by Staff member (those tickets that have been marked as Watch- it is the standard Kayako functionality). Number of watched tickets is displayed in brackets (the same way as it appears in the My Tickets filter).
2. Ticket List filtered by the Watched by me item retains the full functionality of an ordinary ticket
list, the only difference is that it shows Watched tickets only for this Staff member.

Organization File Archive
The objective of this module is to provide a file archive for each User Organization.
Our customers have an individual configuration files and one customer shall not be able to see files for another customer. Therefore, we need the individual file archives.
File archive allows you to create a personal file storage for each organization.
Organization File Archive
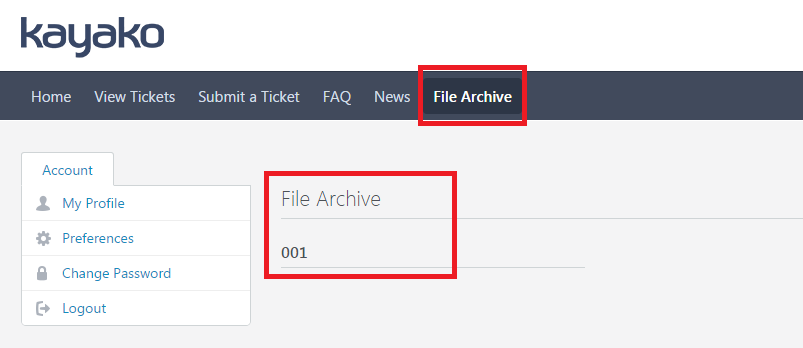
1. All users can read the files from a file archive in Client CP.
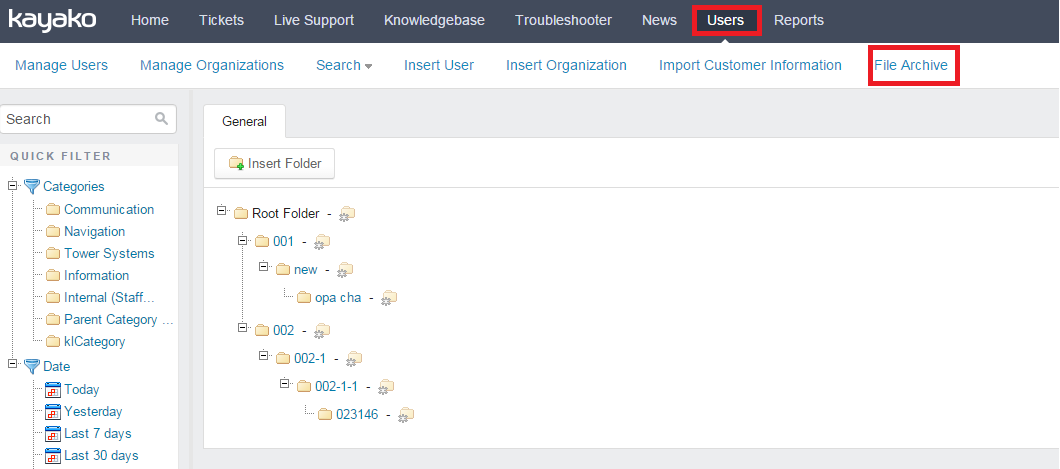
All files are displayed in folders and sub-folders. Each organization has its own folder for the file
archive, so users of one organization will not be able to see files of another organization.
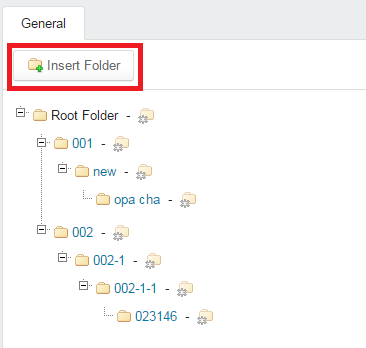
2. Each folder in the file archive can have its sub-folders.
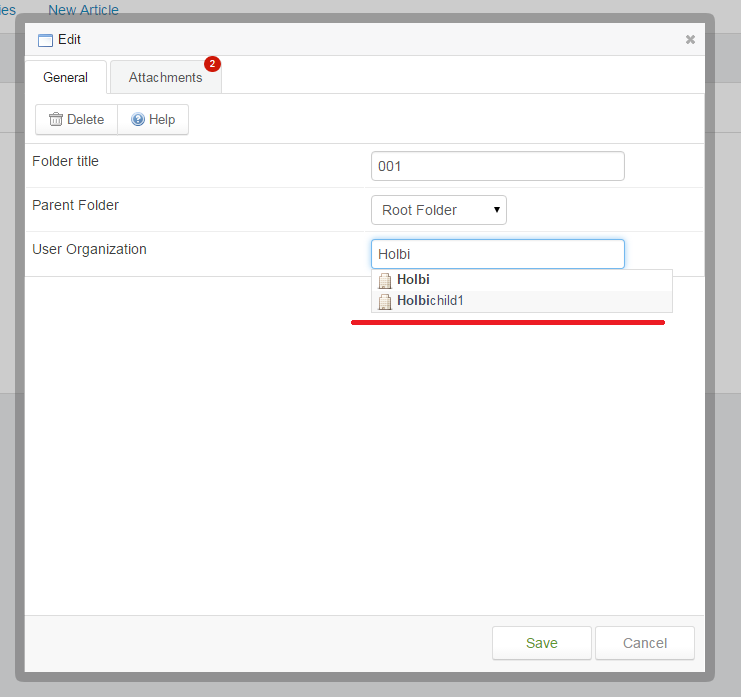
3. Sub-folders inherit access permissions from the parent folder at the moment of their creation, but
you can change them, to do this you need to assign sub-folder to another organization.
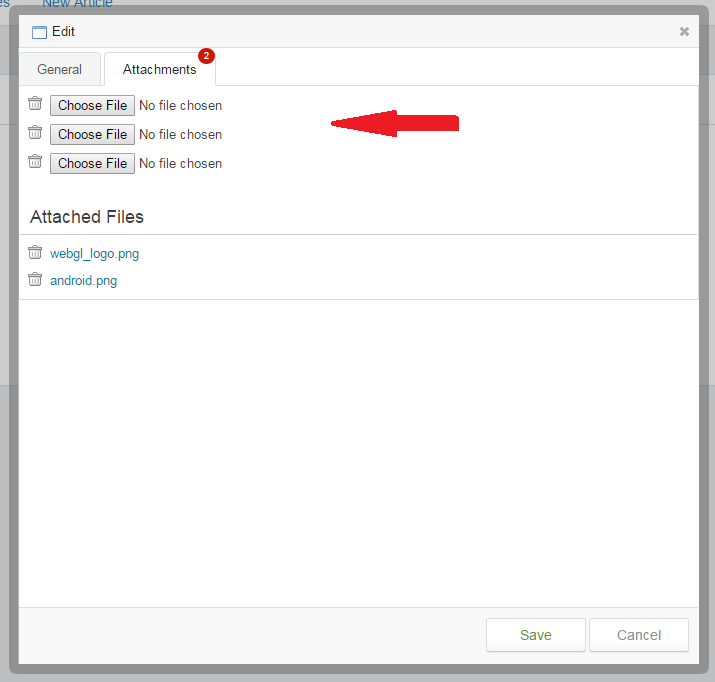
4. Staff members can manage folders and download files from the Staff CP.
5. The File Archive is available on the control panel right after logging in, and it does not require
additional logging in.
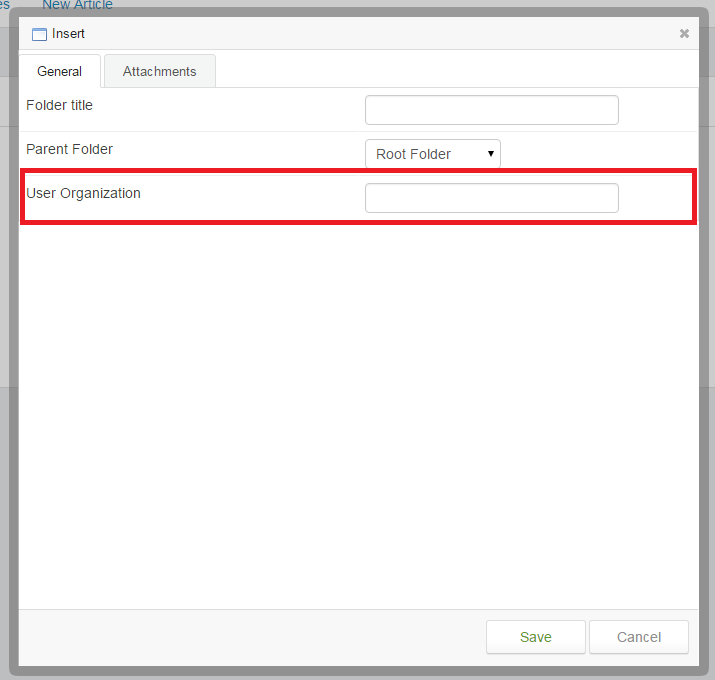
6. Creating a new folder, for file archive, Staff member can assign this folder to the specific
organization, thereby identify which users will have access to this folder.

Mark As Read
The objective of this module is to make it possible to alter manually whether a ticket is
perceived as read or unread. You can make it apparent that a ticket post has not been dealt with, even if someone has had a look at it.
Mark As Read
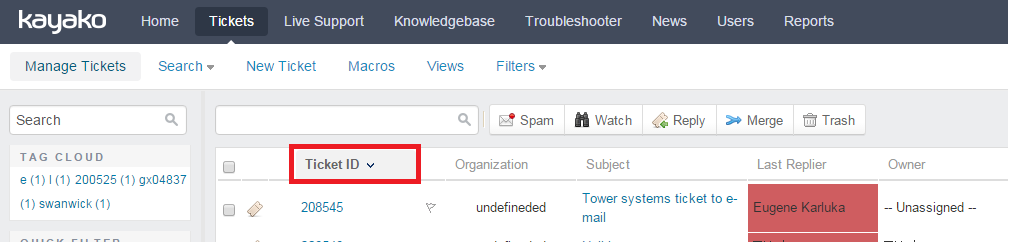
1. Each ticket has two statuses: “Read” and “Unread“.
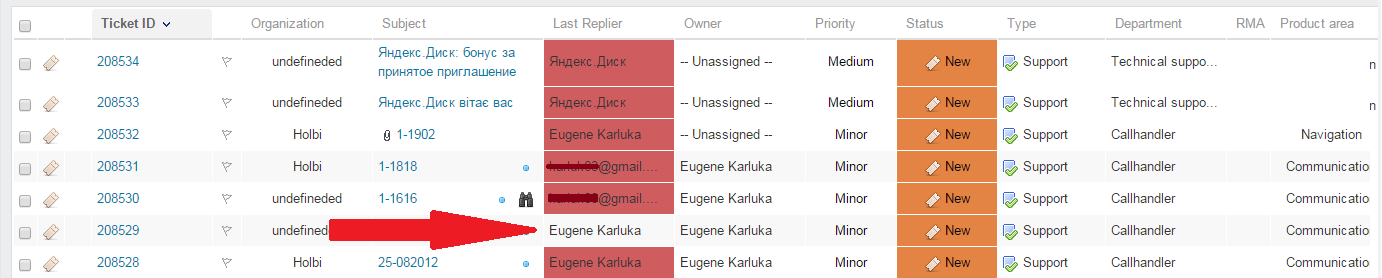
The background color changing is used to display ticket status in the “Last Replier” column:
the unread tickets have the red background. Tickets that have been read have the same background
color as the other columns.
2. If a Staff member has opened a ticket to read it, its status doesn’t change (it means that the
Staff member has followed the Ticket ID from the Ticket list).
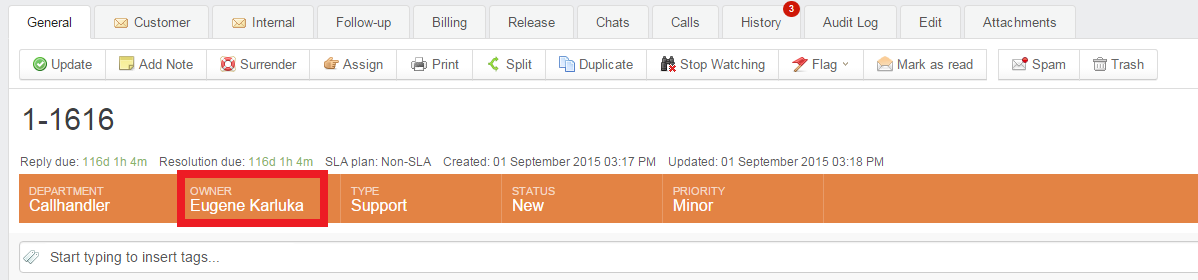
3. You can change the ticket status using the “status changing” button next to the Flag called
“Mark as read”.

The system will change the title of the button depending on the ticket status.
The Mark as not read button is for the tickets which you have already read, the Mark as read is for
the unread tickets.
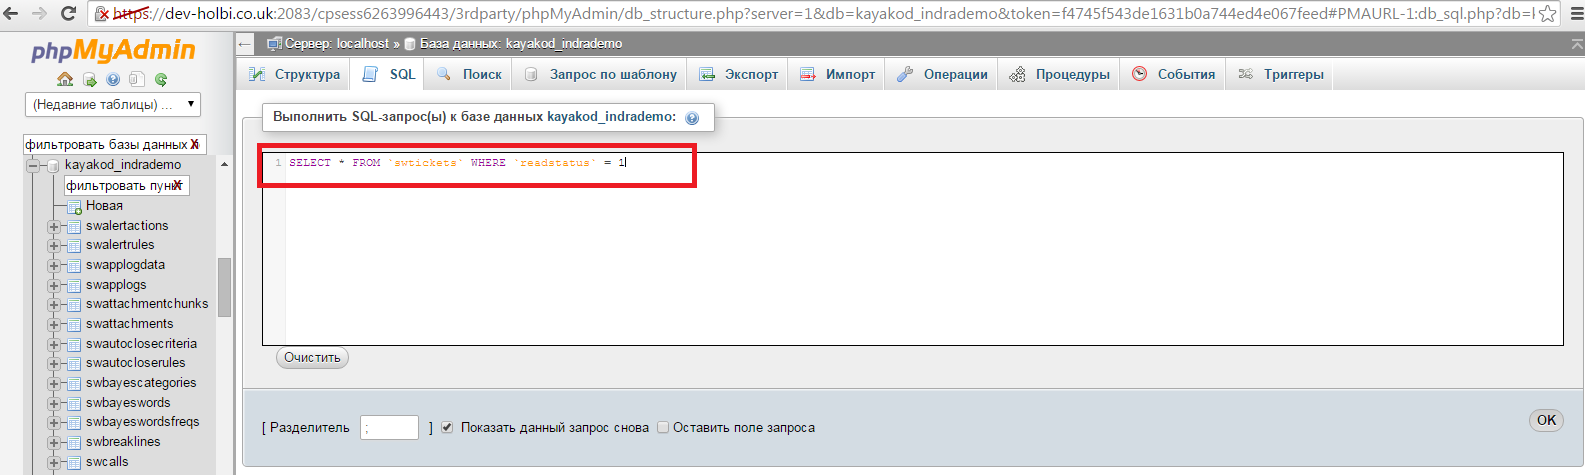
4. The Ticket Status is stored as a field in the database, you may find all unread or read tickets
using an SQL query.

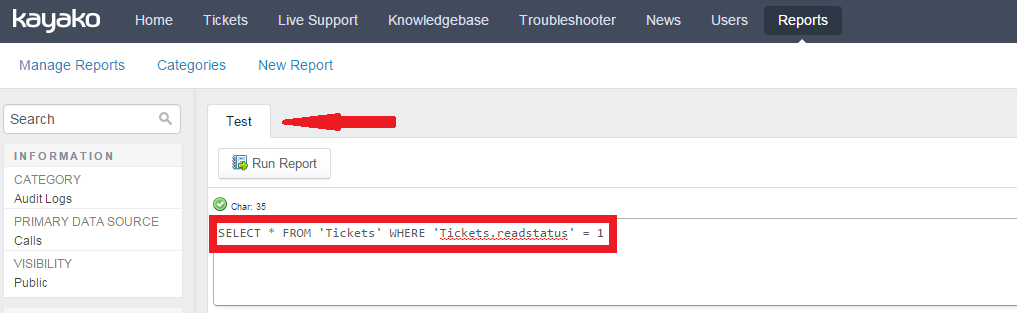
5. During a report creation, you can filter Kayako tickets by their status and run this report
with the list of unread tickets and tickets that have been read.

6. If someone else except a ticket owner answers a ticket, for example, Customer or another
Staff member, the ticket will change its status from Read to Unread automatically.
Note: If a ticket has the Unread status, before someone has written a comment, its status won’t
change.
7. Any Staff member can become a ticket owner if he has just took over the ticket processing.
Note: If a ticket owner answers his/her own ticket, its status doesn’t change, regardless the status it
has had before.
Column Width Limit
With Column Width Limit you can prevent the Subject field and the Organization field from shrinking when adding more columns to the Ticket overview (the other fields can be customized, too).
Column Width Limit
1. You can specify a minimum width, in pixels, for the Subject and Organization columns in the ticket view; these columns could not be compressed by more than the specified size.

2. To be sure that columns will never shrink less than the predetermined width in the ticket list in the Staff CP, you should specify width in pixels in the Admin CP. Go to Admin CP → Home → Settings → Field Settings.
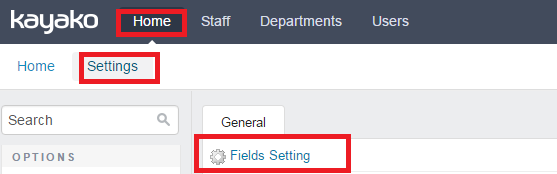
Here you can see width adjustment for columns: Subject, Organization.

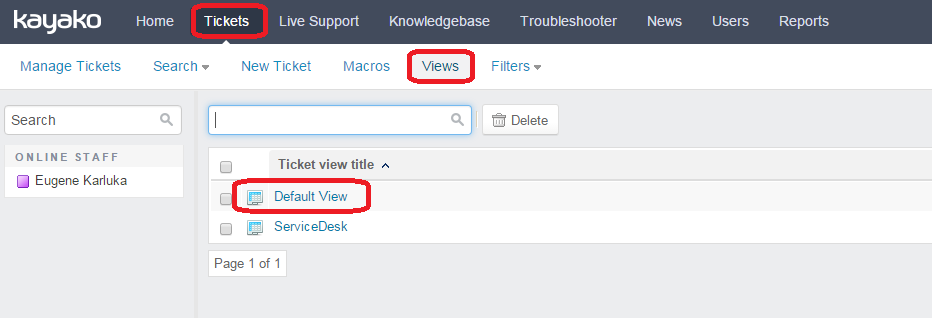
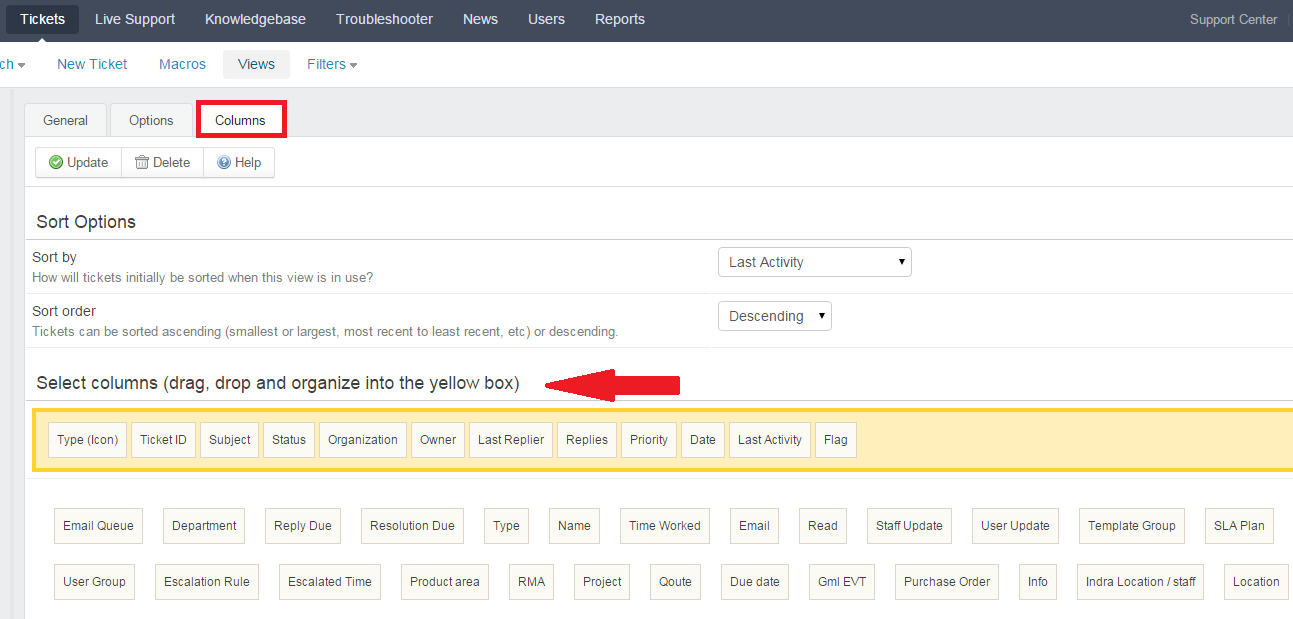
3. Remember, when you add a variety of different columns in the ticket list, all columns of the table reduce their width, to fit the screen, but Subject and Organization columns will never be compressed more than to the value specified in the settings. To add new column, in the Staff CP go to Tickets → Views → Default View.
Choose the Columns tab.
Note: Subject and Organization width can’t be less than the value specified in the Options, but it can be larger.

Ticket Gravity Module
You are not happy with the way Kayako sorts tickets? We want to present you Ticket Gravity Module, it is a new, rich and flexible way to sort tickets in Kayako! This module assigns a certain amount of points to each ticket (this amount depends on settings you will make) and then it sorts tickets by these points.
Staff CP
In Staff CP, you can sort tickets easily using the Gravity column.
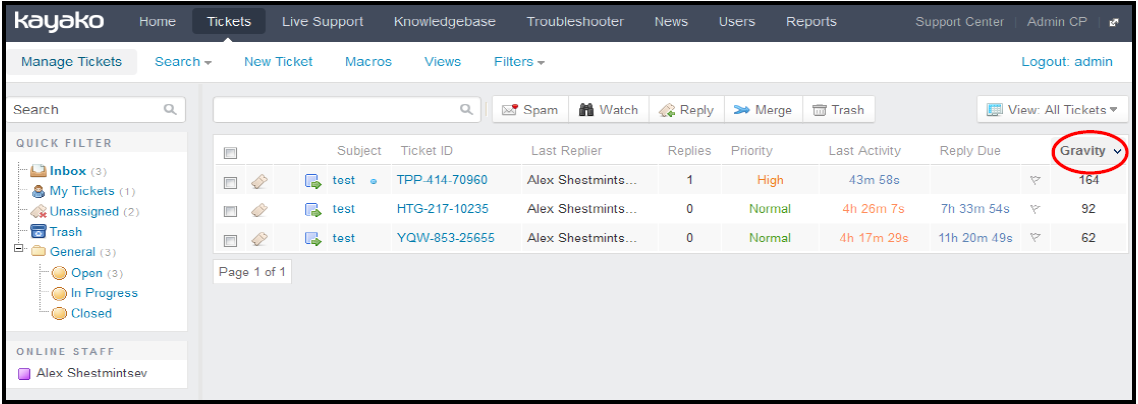
The Gravity column
When you open a ticket you can see points assigned to this ticket in the Information box. In the Audit Log tab you can see how this points were calculated.
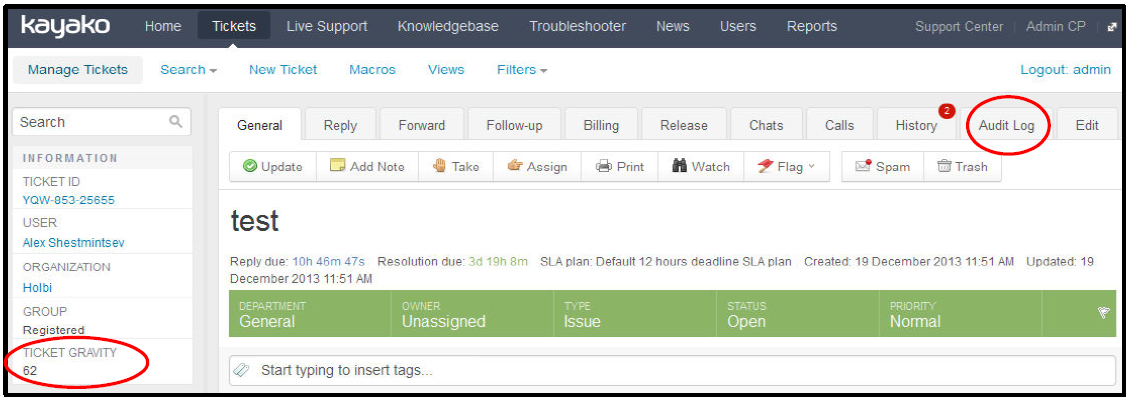
Points assigned to this ticket and the Audit log tab.
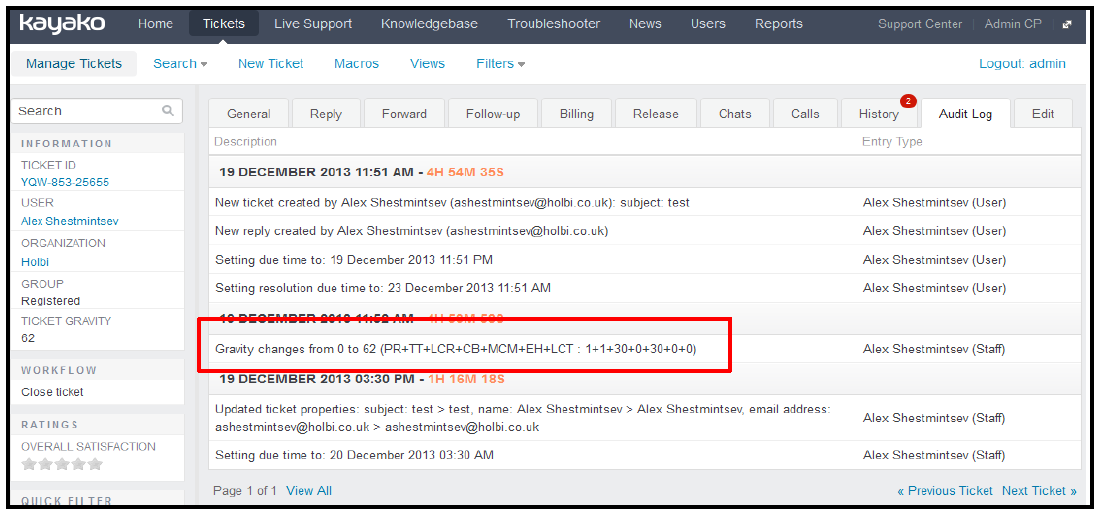
Here you can see how the current score is calculated.
To highlight a certain ticket, you can use Manual Weight Correction (MW). Open the ticket you want
to highlight, click on the Edit tab, scroll down, find Manual Weight Correction (MW), fill its field in
with the points number that you want to assign to this ticket. Scroll up, click Update to save changes.

Here we can see that this ticket has only 86 points.
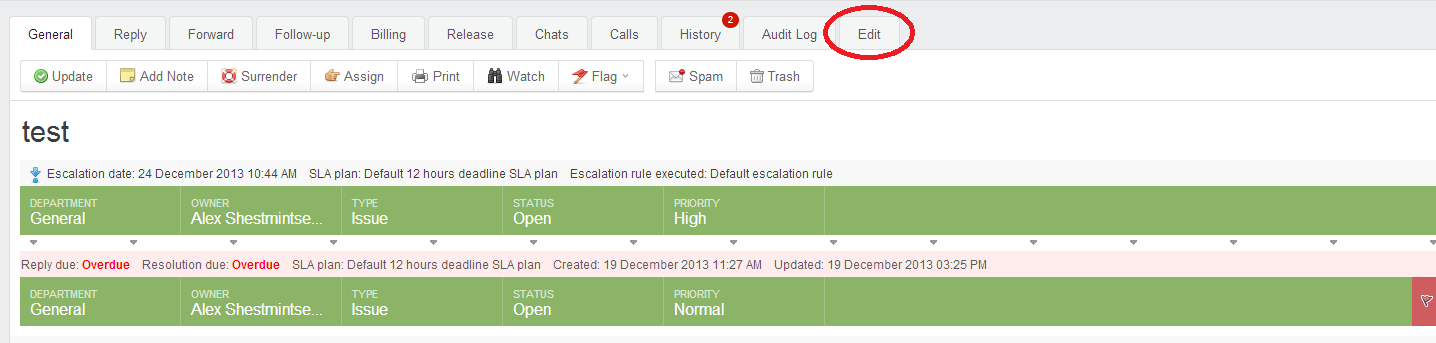
The Edit tab.

The Manual Weight Correction field.

The Update button.

We have changed the score, using Manual Weight Correction (MW). Now, when ticket has 786 points, we can find it easily.
Admin CP
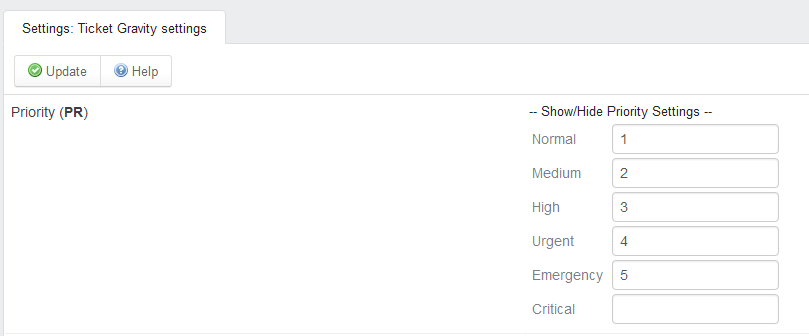
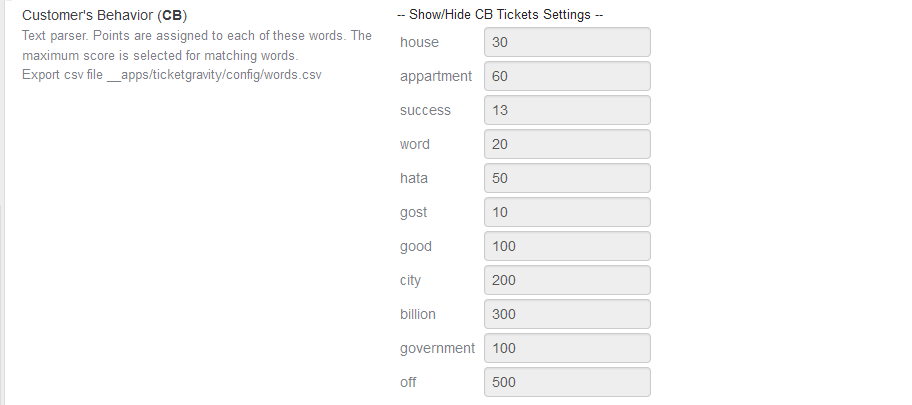
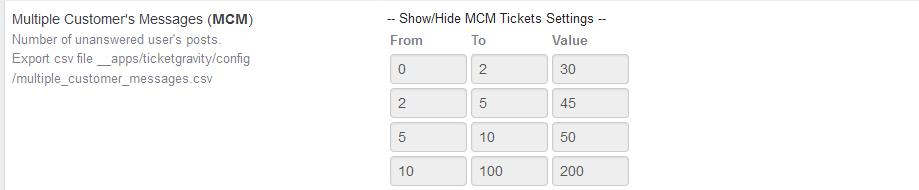
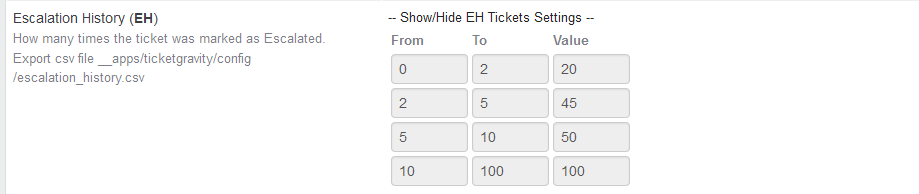
Ticket Gravity settings:


Please, check out the demo here:
Staff CP: http://gravity.kayakodev.com/staff/
login: admin
pass: 111111
HotKeys/ Shortcuts Module
Got used to Google Shortcuts – get used to Kayako Shortcuts now! The HotKeys/Shortcuts module allows you to apply shortcut commands to the set of operations for ticket processing and ticket listing screen. Specify shortcuts for the actions provided as per your individual preferences and enjoy your workflow speed. The extension includes predefined actions like ‘Send Ticket’, and auto-completing workflow ones as well. All you need is to create a workflow action and to apply a shortcut command to it. You may find it very useful.
We are constantly adding new features to the extention.
The module lets you to apply Hot Keys for the following actions:
- Quick Update/Send Ticket
- Next Ticket
- Previous Ticket
- Print Ticket
- Mark as spam
- Delete Ticket
Navigate to:
- General Ticket Tab
- Reply Ticket Tab
- Forward Ticket Tab
- Edit Ticket Tab
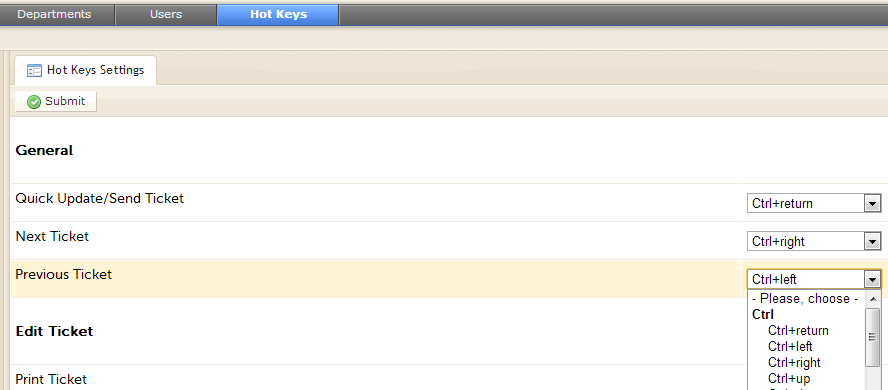
Hot Keys Settings
The ‘Shift+?‘ short cut is designed to provide you with all Hot Keys combinations reminder.
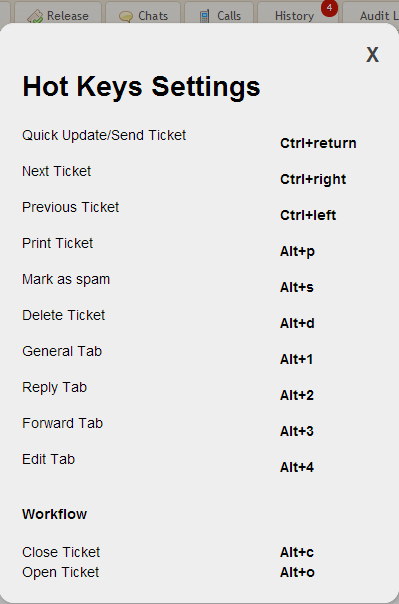
‘Shift+?’ → Hot Keys Settings Reminder
Please, check out the demo here:
Staff CP: http://hotkeys.kayakodev.com/staff/
login: admin
pass: 111111

Ticket Custom AutoResponse
The Ticket Custom Auto-Response module will allow your Kayako system to send subject-related canned auto-replies to clients after they have just submitted a ticket. The response will be triggered if there is a word in a ticket that matches a special macros tag. The module is aimed at enhancing the ticket reply functionality, based on macros.
Below is the description how the module works:
- During a ticket creation (no matter via mail parser or from users CP) the system checks whether there are words that match special macros tags in the ticket text.
- The system counts how many words coincide and how many times each coinciding word is repeated in the text.
- If there is 1 match, an auto-reply is created from macro and sent to the client.
- If there are 0 or 2 and more matches, no auto-reply is sent, except standard auto-replies, if any.
Please, check out the demo here:
Staff CP: http://click2.kayakodev.com/staff
login: admin
pass: 123
User CP: http://click2.kayakodev.com
Instructions:
1) Create a new macro for ticket custom auto-response in the Staff CP. Fill in all fields in the General tab of the Insert Macro popup, as shown below:
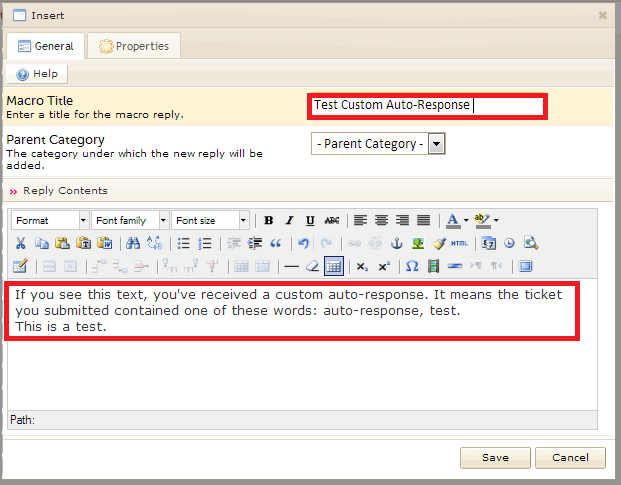
Insert Macro popup: General
2) To assign the macro to a certain department, use the Department dropdown at the bottom of the Properties block in the Insert Macro popup.
Make sure you have specified tags in the top Add Tags field (there are two of them), as shown below on the screen:
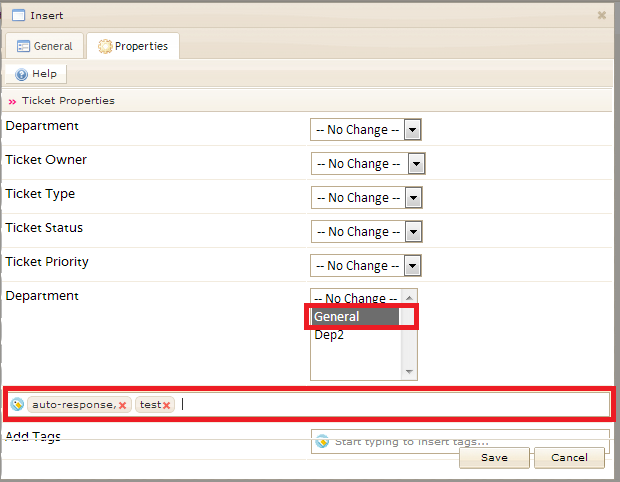
Insert Macro popup: Properties
3) Submit a ticket from Client CP with the tag-word in the text (in Subject or Body). Don’t forget to select a proper department.
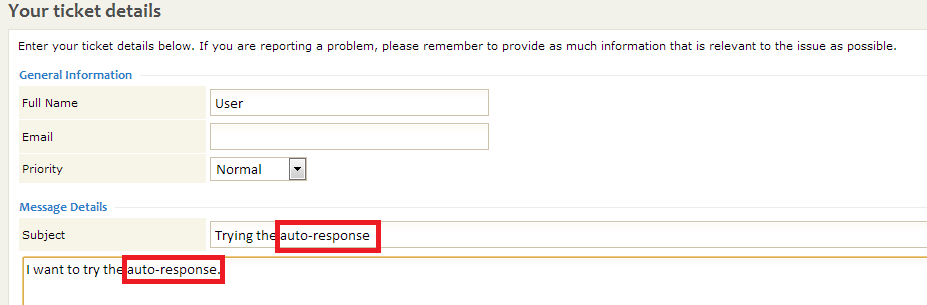
Submitting a ticket from Client CP
4) The macro-reply will be sent back automatically to the client if there was one match between the word and the tag.

The macro-reply is received

SupportPay Module
SupportPay is a plugin module which allows you to charge your customers for support calls and ticket resolution. The existing users’ accounts are used as an existing base for extra information on their credit levels: ‘minutes‘ or ‘tickets’. Here the last are payment units that have to be purchased by users to pay for a single ticket or chargeable time on it.
Key Features:
- Simple Installation
- Bill for both Tickets and Live Support
- Supports many currencies
- All Payments are automatic
- Track customer credit levels automatically
- Sell ‘Minutes’, ‘Tickets’ or ‘Packages’
- Clients can be their own Account Managers
- Affiliate bonus system for signing up others
- Pay your staff commission
- Built-in reporting
- Integrate with WHMCS
- Handle Tax Calculations
- Regular Billing Agreements (Recurring Billing)
- Pre-Approved Credit Card Payments
- Simple upgrade path from SupportPay or TicketPay for SupportSuite
Below is the description of some module features:
For Staff
With the SupportPay module your existing ticket handling workflow will be the same as it currently is. The only real change is that your staff has an option to check a user’s credit levels before working on a ticket.
View users’ lists with info on minutes and tickets credits they currently have, the number of affiliates that were signed up and an account manager, if any.
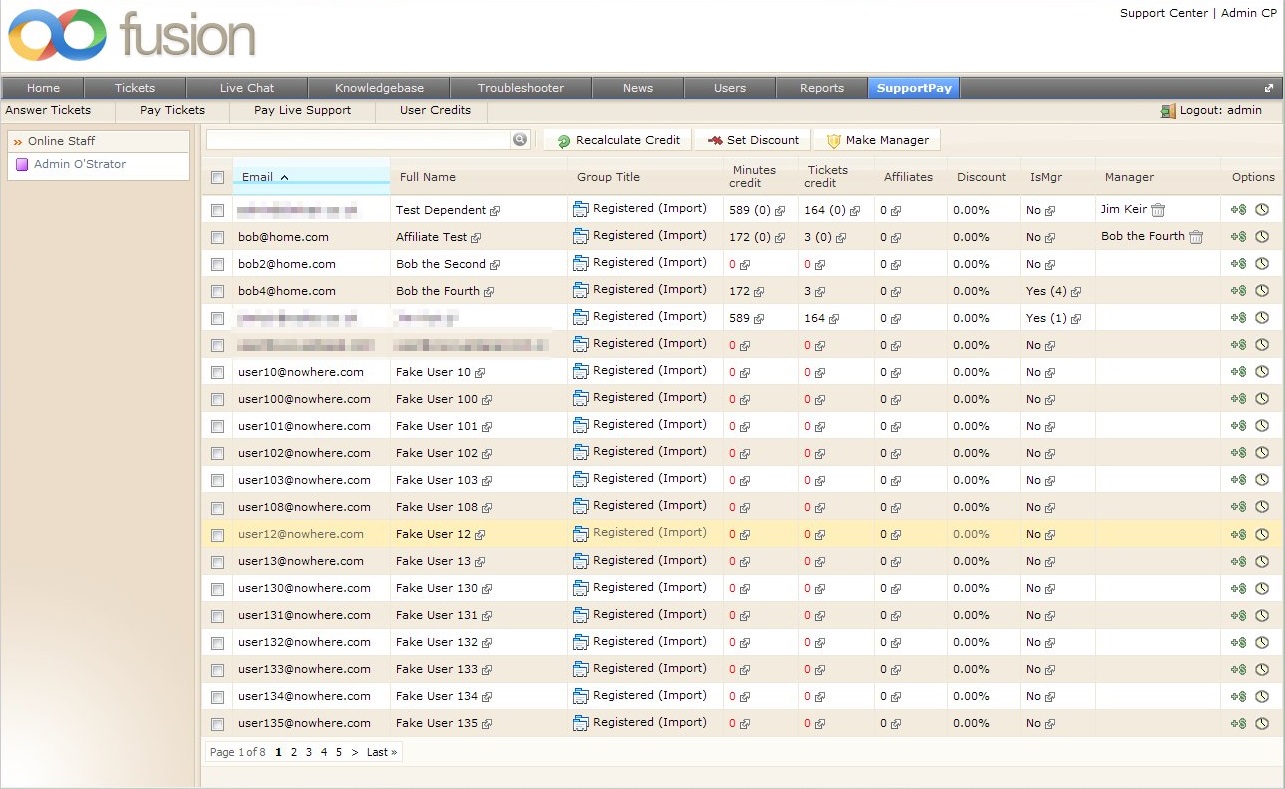
User Credits
View a client’s entire history of payments and use of credits.
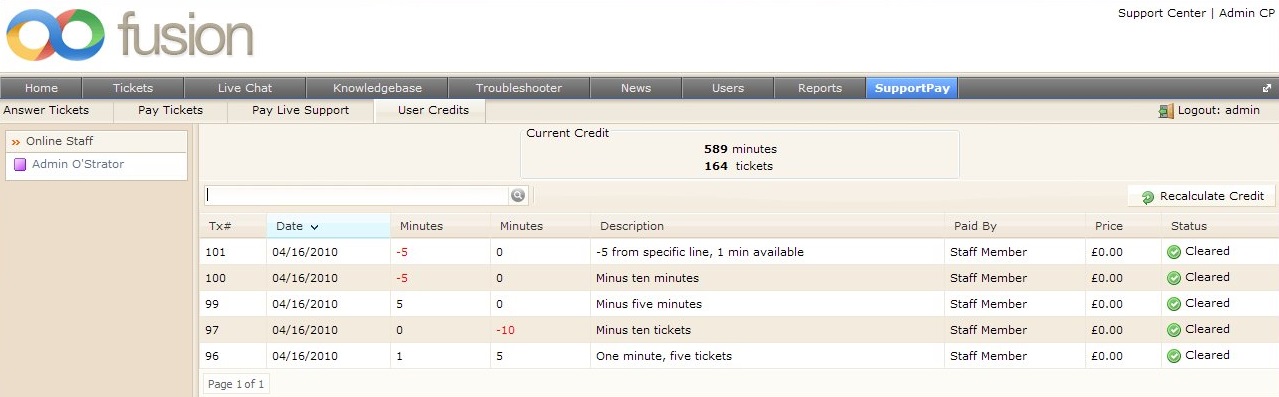
Staff View of Credit History
For Users
The module also provides new experience for users, allowing them to have an access to the billing system from their accounts. Now users will have extra information about which tickets have been paid for, their current credit limits and payment transactions. Still the user workflow has one important change – credits must be purchased by users.
User front page provides very simple, easy-to-use widgets to manage payments that become accessible after a user has logged in.
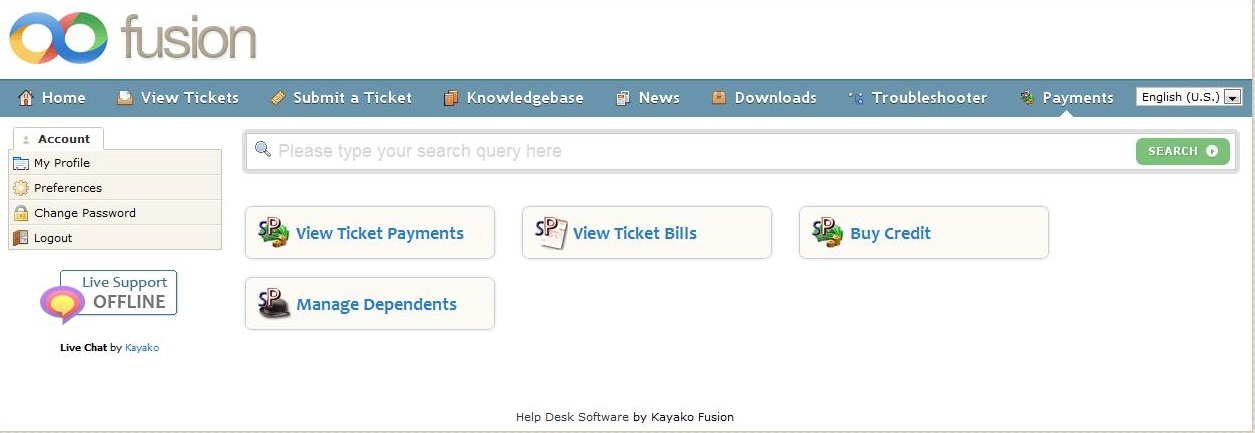
Client Controls
Click on the View Ticket Payments button in the Payments tab navigation menu to look through your payment history.
In a new page user’s current credit is displayed. The grid shows the most recent payments made by a user. A small control with Dates on the foot of the page allows clients to Print their own account statements. The Purchase buttons, placed below (which can, of course, be customized), enable to get more tickets, minutes or packages.
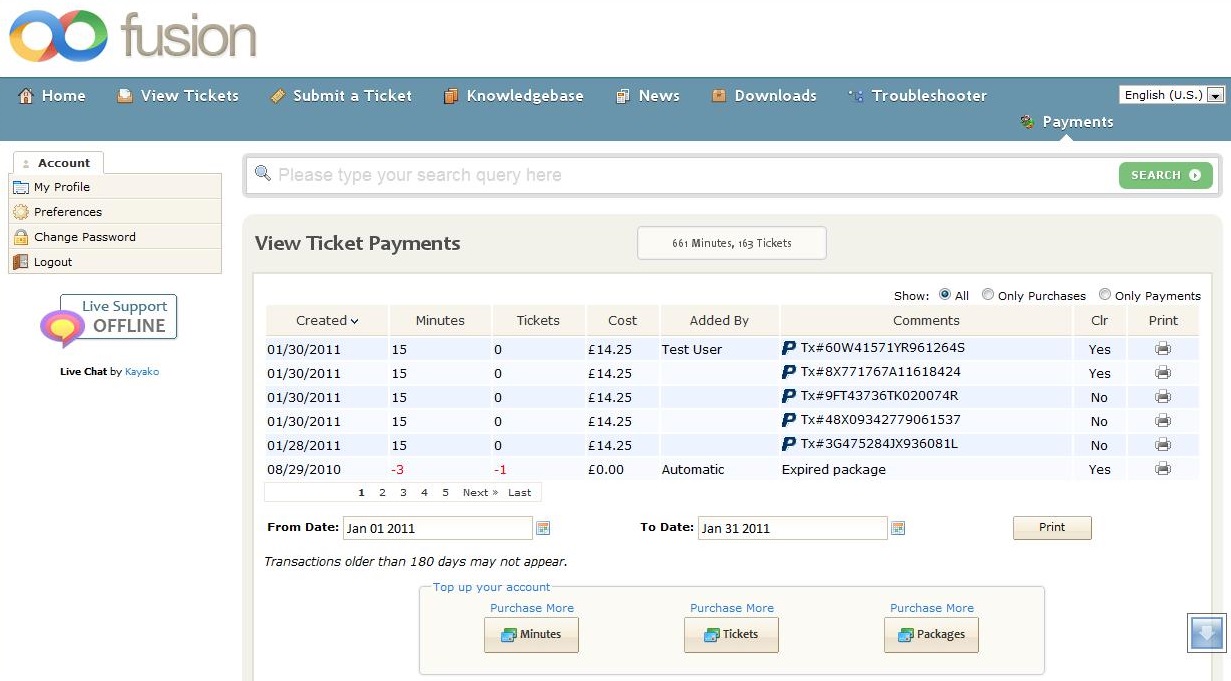
Payment History
 kayako-solutions