


ITIL module
Our ITIL module will help you improve the quality of your IT services and satisfaction level of your users.
This module consists of three parts: the Incident management, Problem management and Change management.
Incident management and Problem management
Categorization of the incidents using tags
1. To create a new tag, we need to log in to the Admin CP, choose Tag Configuration → Manage tags, click New.
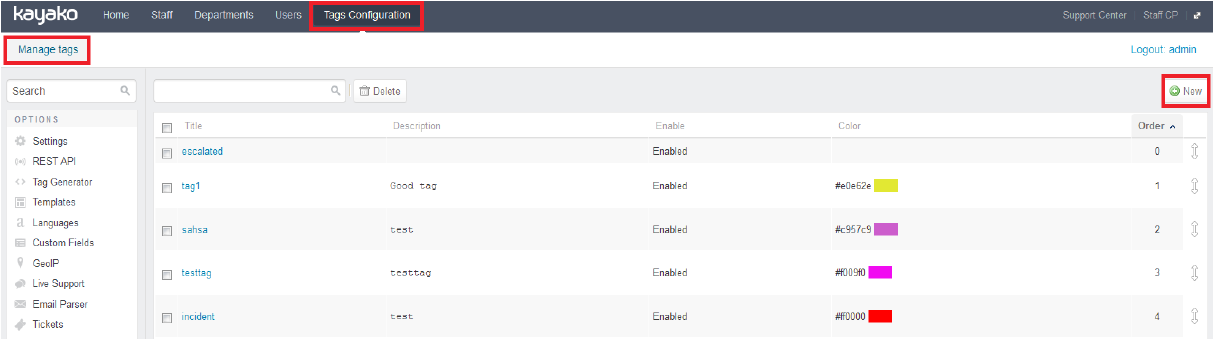 Note: In the Manage Tags tab you can also delete or edit already existing tags.
2. Fill all the fields in and click Insert.
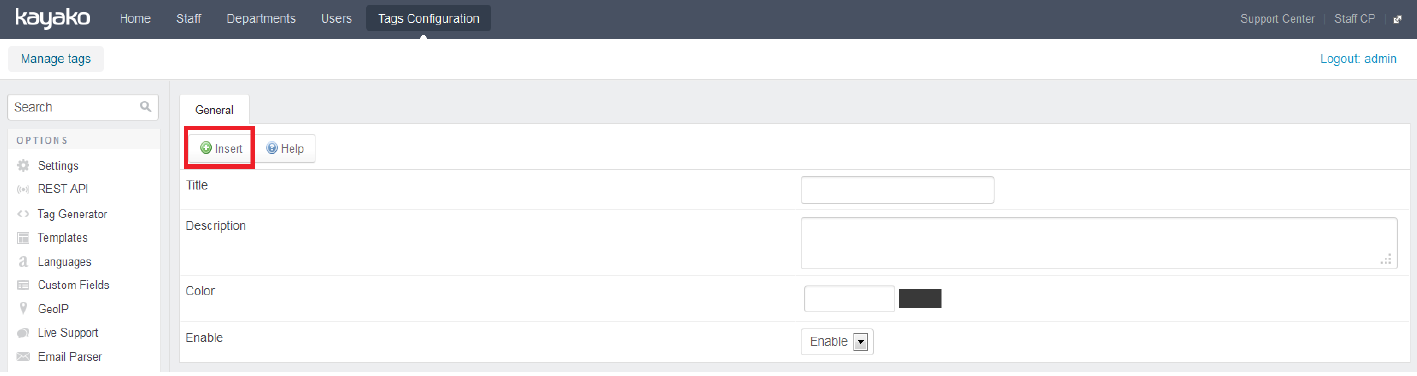 Note: When we create a new ticket, we can assign these tags to it. Also, we can categorize and find tickets using standard report functionality.
Creation of a problem from categorized incidents.
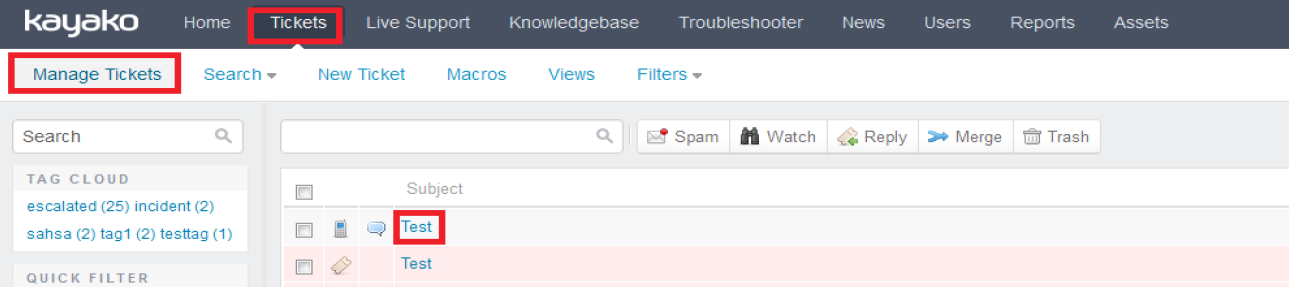
1. We want to create a new problem which will combine tickets associated by one incident. To do this, we need to log in to the Staff CP, and in the main menu choose Tickets → Manage Tickets.
 Note: In the ManageTickets you can also delete or edit tickets.
2. In the sidebar menu, in the TAG CLOUD, choose tickets we want to combine. In our demo system, there are 2 tickets associated by one incident, select them and click Create new problem.
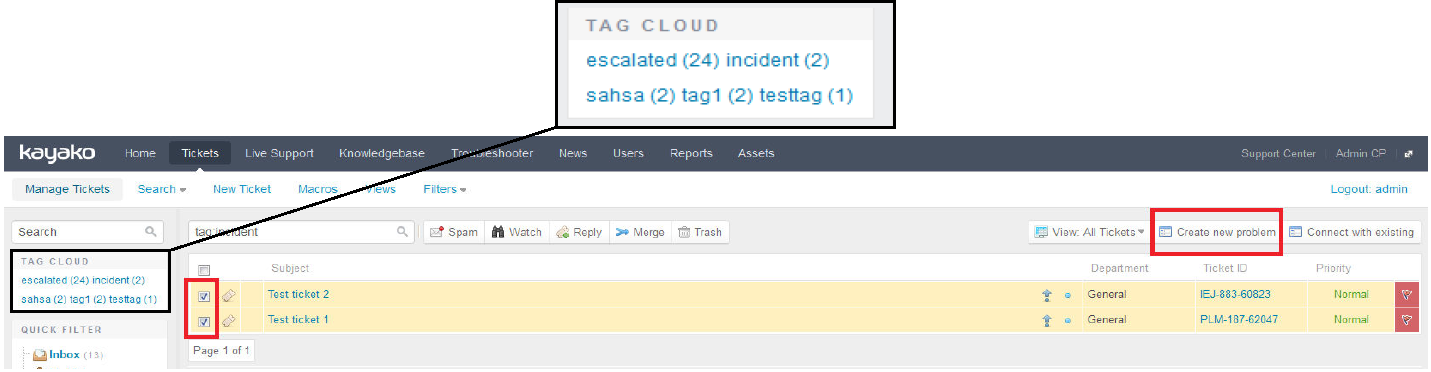
Tag Cloud, tickets combined with one tag, the Create new problem button.
3. Now we see the form of the problem ticket creation. As you can see some of the fields are already filled in. We fill all the empty fields in. Below, there are all insedents that we want to associate with the new problem ticket. Сlick Create to complete.
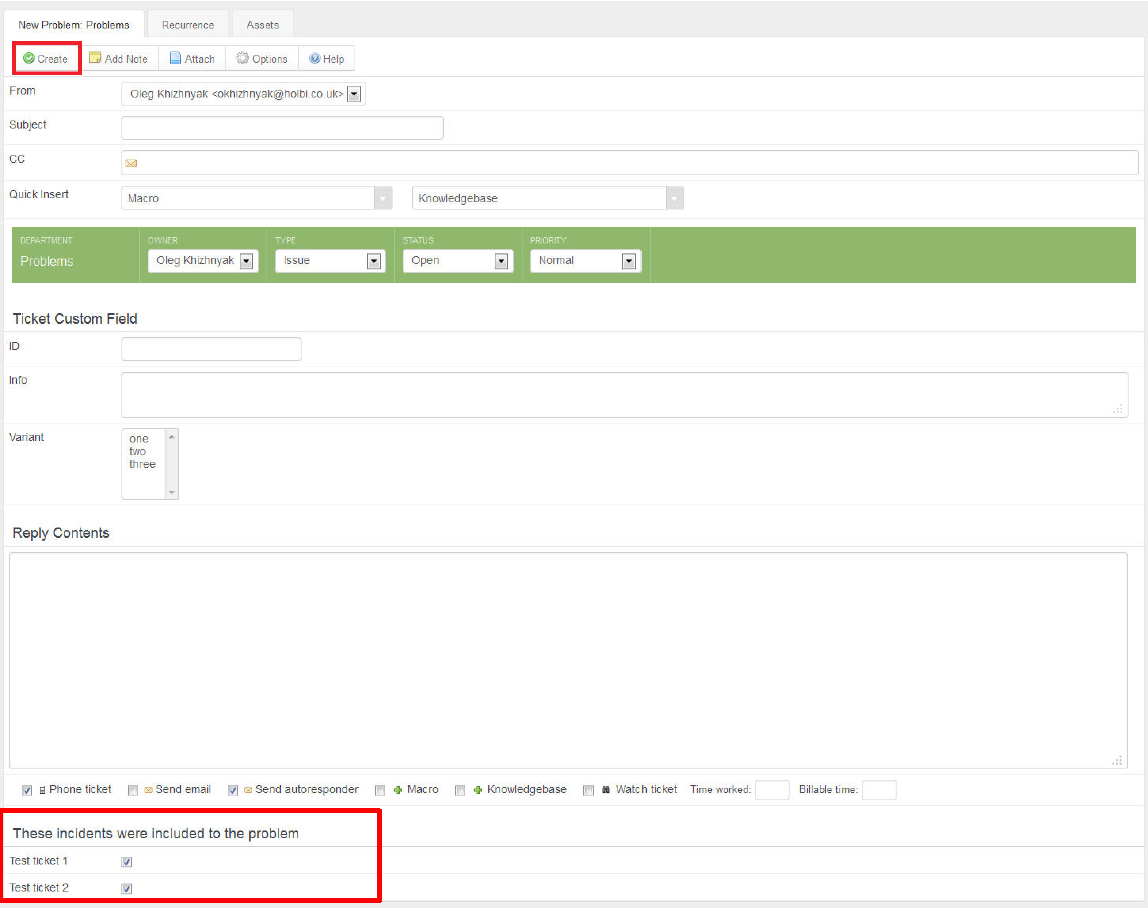 All insedents which are included to this problem, the Create button.
4. We have successfully created a new problem. There is a new tab called Incidents in this problem ticket, in this tab we can find information about tickets assigned to this problem.
 The Incidents tab
5. Also, each incident ticket, assigned to a problem, now has the Problems tab with the information
about the problem it assigned to.
 The Problems tab
6. Using the Connect to the existing button any incident ticket can be added to the already existing problem. To do this, we need to select the ticket that we want to add to the problem, click on the Connect to the existing button and select the problem to which we are going to add the ticket, and then click Update.
 The Connect to the existing button
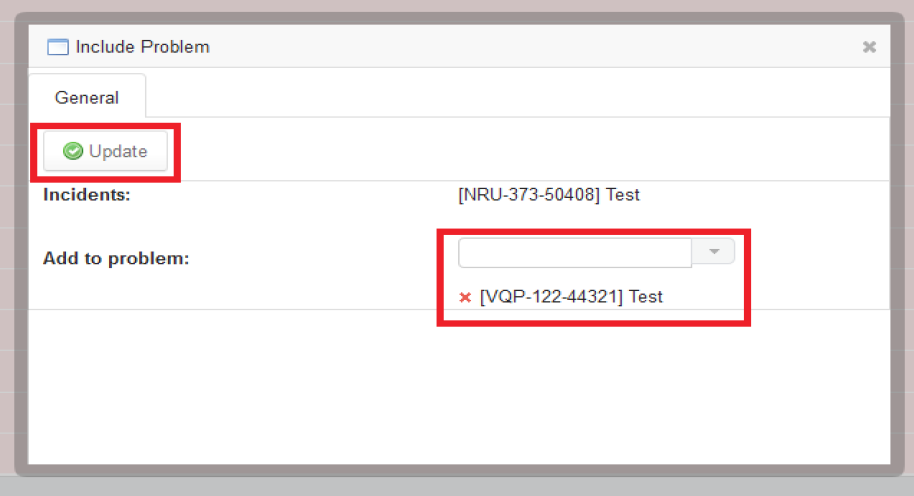 The Include Problem pop-up
Change management
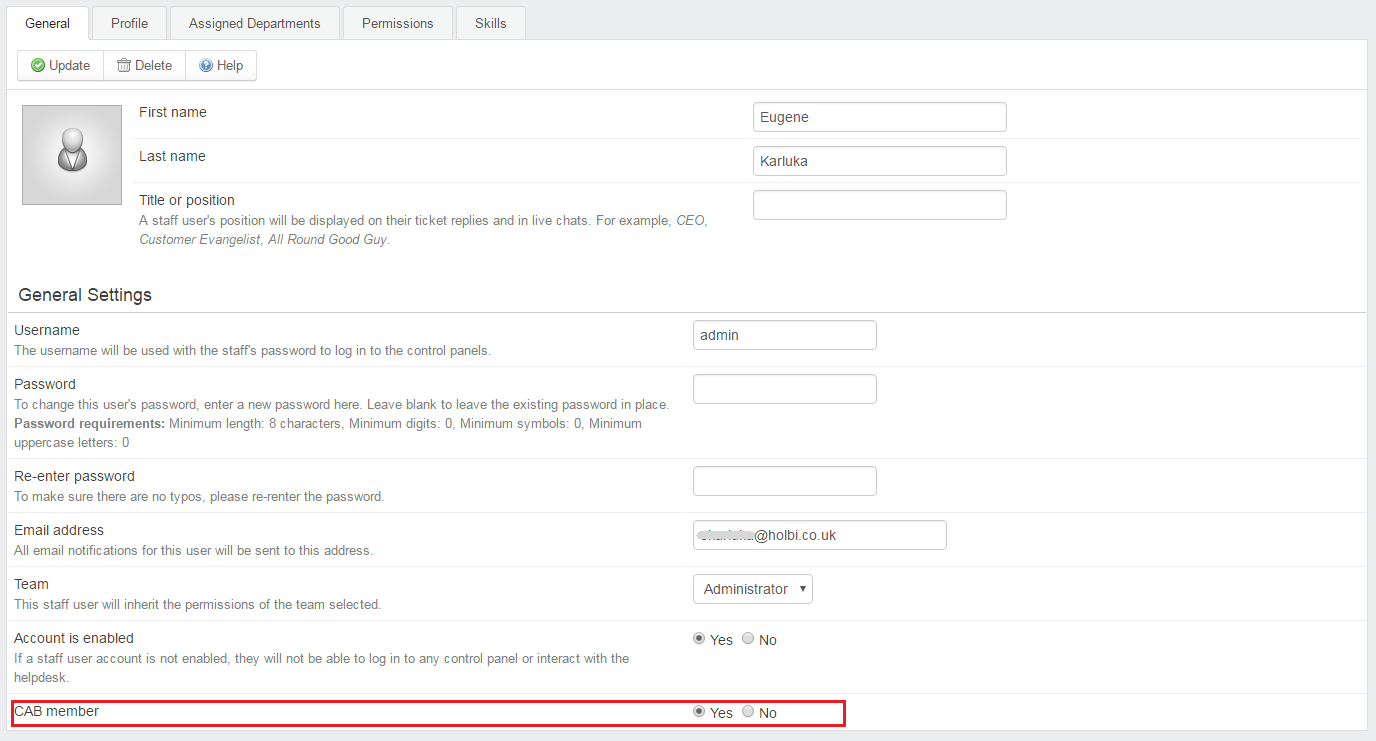
1. First of all you should you should choose CAB members in the Staff profiles.
2.To initiate the change management procedure, we need to change the Problems department to the CAB Department. Click Update.
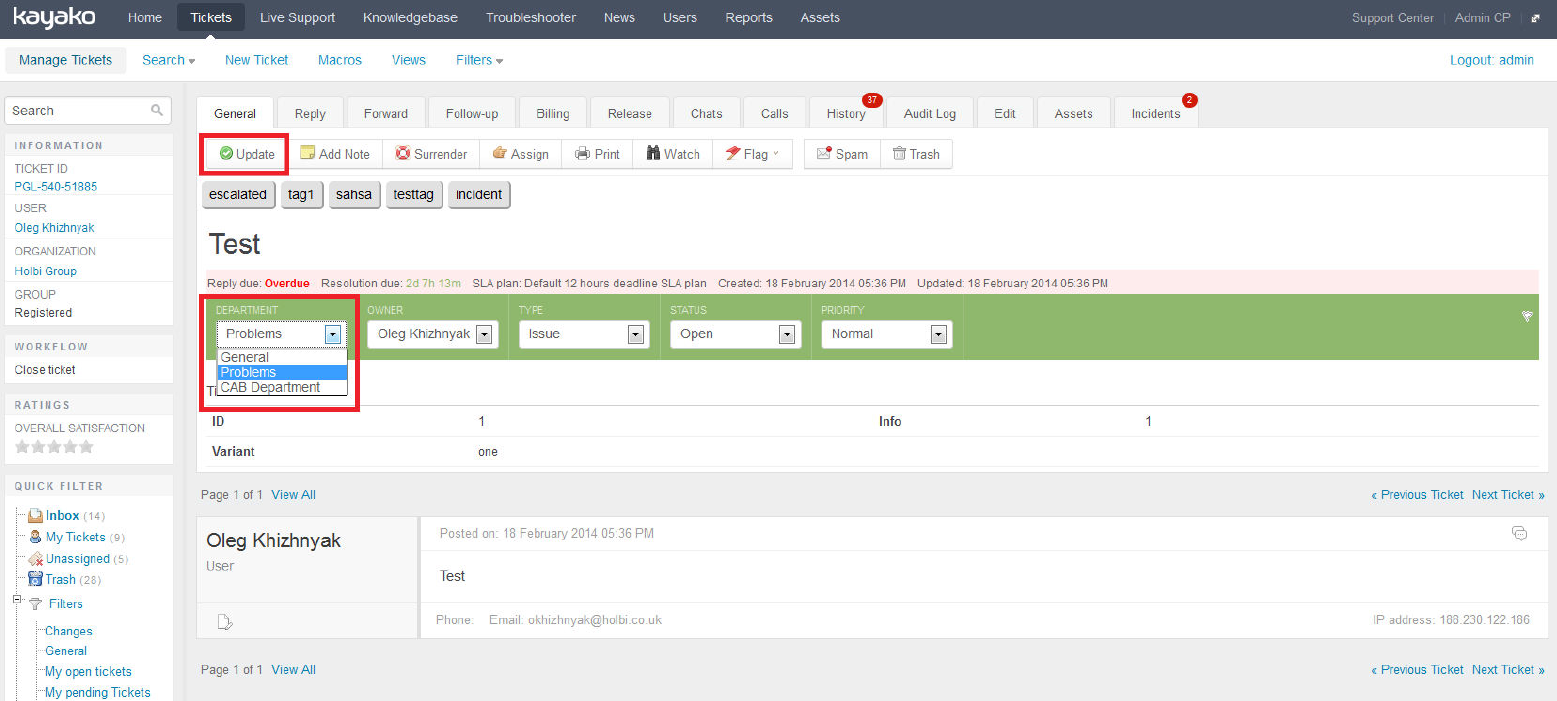 Note: Here you can also change Type, Owner, Status and Priority.
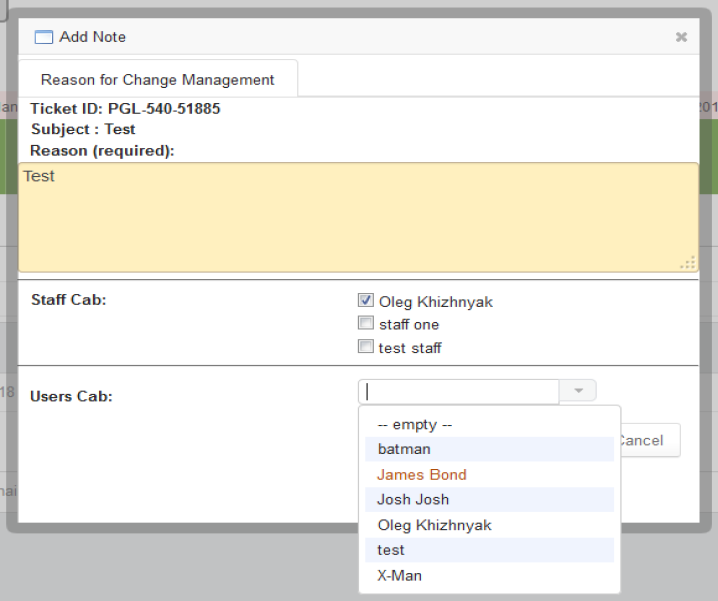
3. Fill the Reason field in. Choose CAB members from Staff and Users. Click Submit.
 Note: Once the status of the CAB request changes to Waiting for approval, Staff and Users assigned to this CAB request will receive a notification. CAB members can approve or disapprove the CAB request, using Staff CP and User CP, respectively.
3. To disapprove a CAB request In Staff CP, in the main menu choose Tickets → Manage Tickets. Open the CAB request.
 We choose CAB request we want to disapprove (in Staff CP).
4. Click Disapprove in the General tab, type in the reason for disapproval, click Submit.
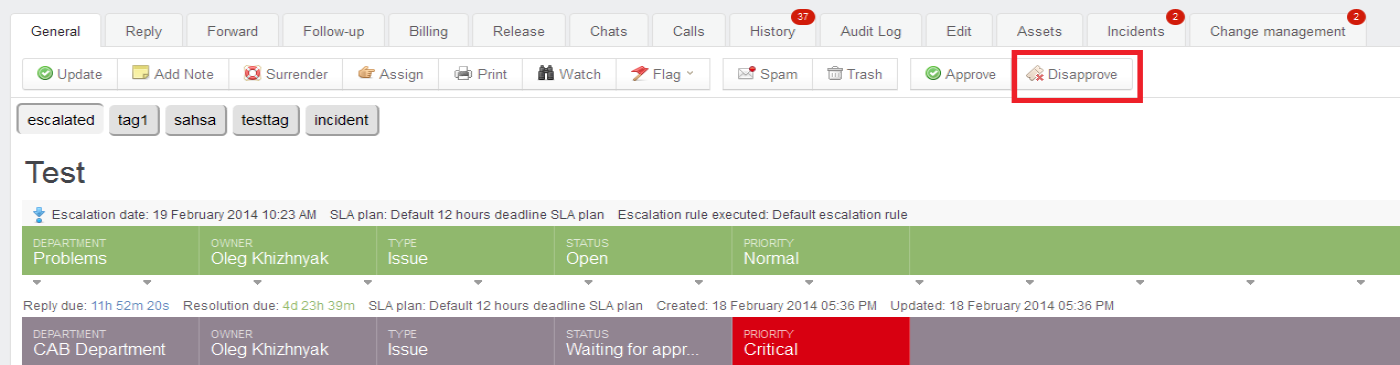 The Disapprove button
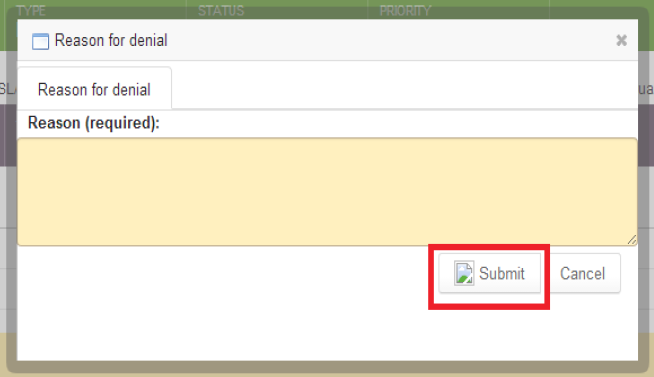 The Reason fo denial pop-up
5. To approve the suggested Change, just click Approve.
 The Approve button
6. To disapprove the CAB request in User CP, in the main menu choose a new CAB tickets widget,
open the CAB request.
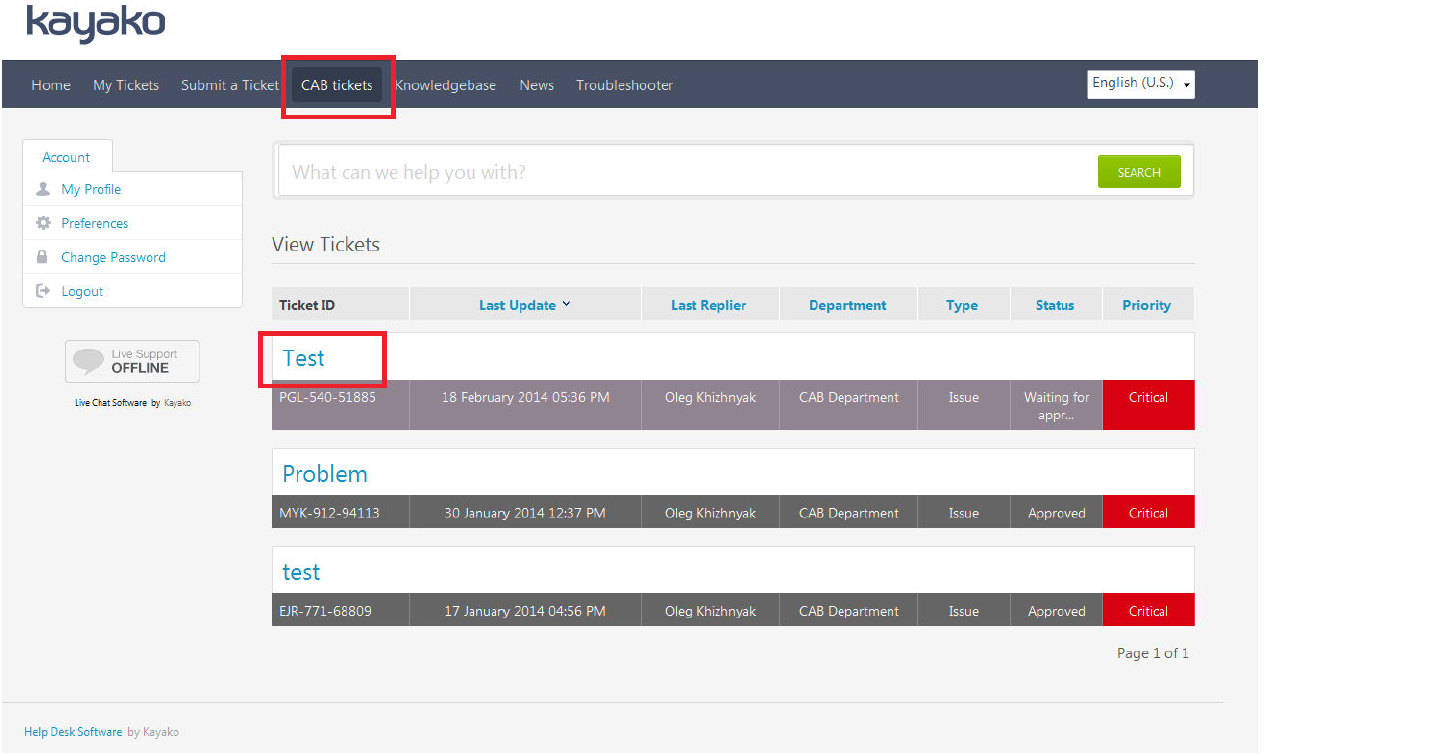 We choose CAB request we want to disapprove (in User CP).
7. Click Disapprove, then type the reason for disapproval in the field, click on the button again.
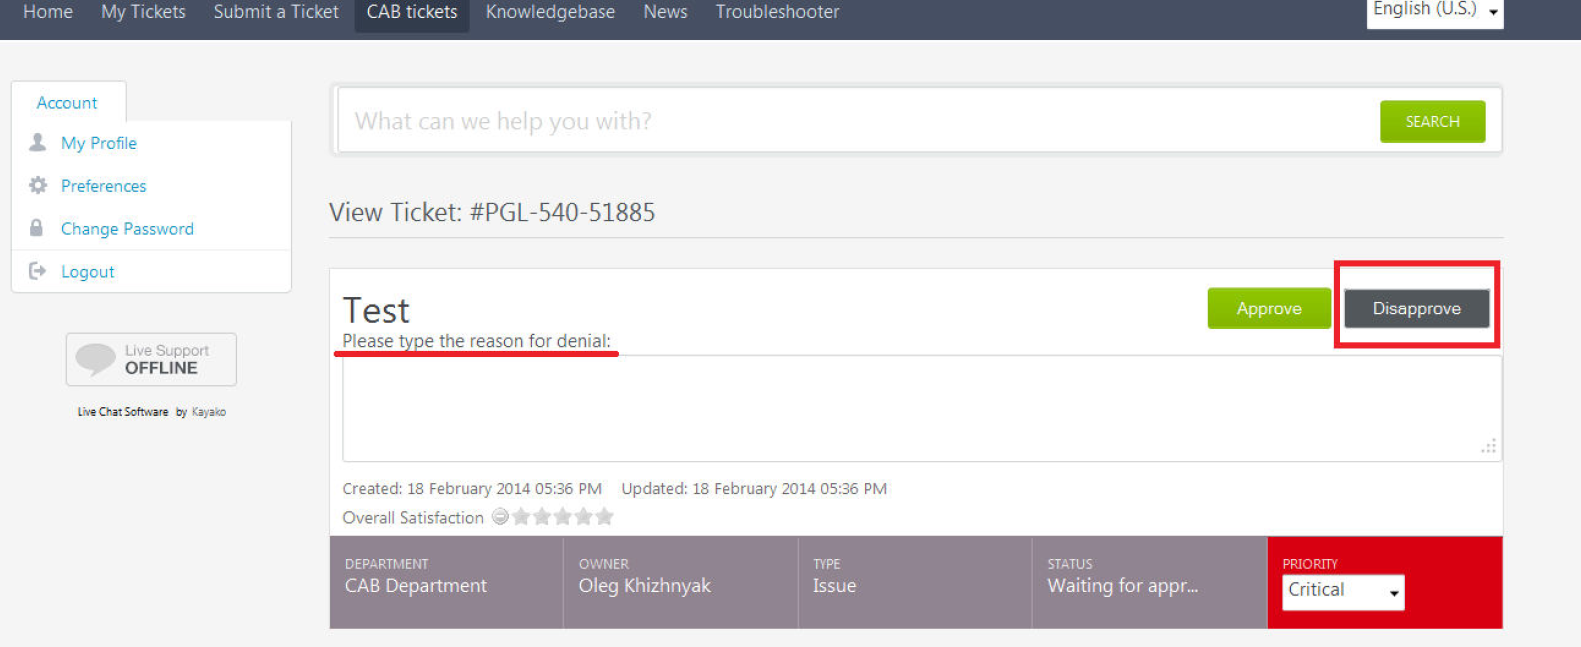 The Disapprove button and the reason for denial field.
8. To approve it, click Approve.
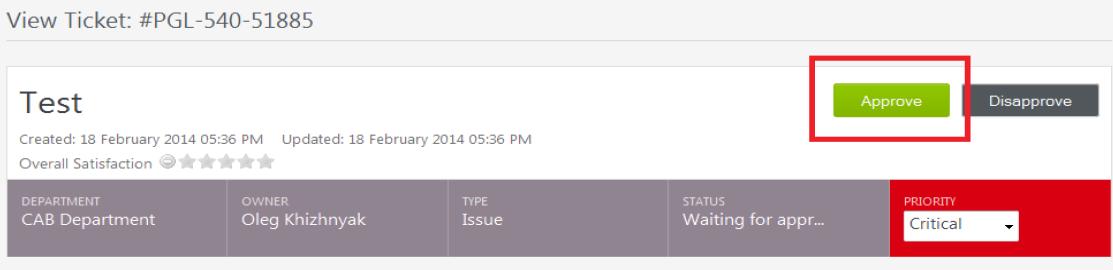 The Approve button
Note: If all CAB members, assigned to this CAB request, approve it, its status will be changed to “Approved”. And if all CAB members, or at least one, disapprove the change, the status of the CAB request will be changed to “Disapproved”.
9. If we want to display the Ticket Custom Fields of the incidents in the User CP, we need to open the
problem in Staff CP and choose the Incidents tab.
 The Incidents tab
11. Click Copy in the column called Ticket Custom Fields.
 The Ticket Custom Fields column
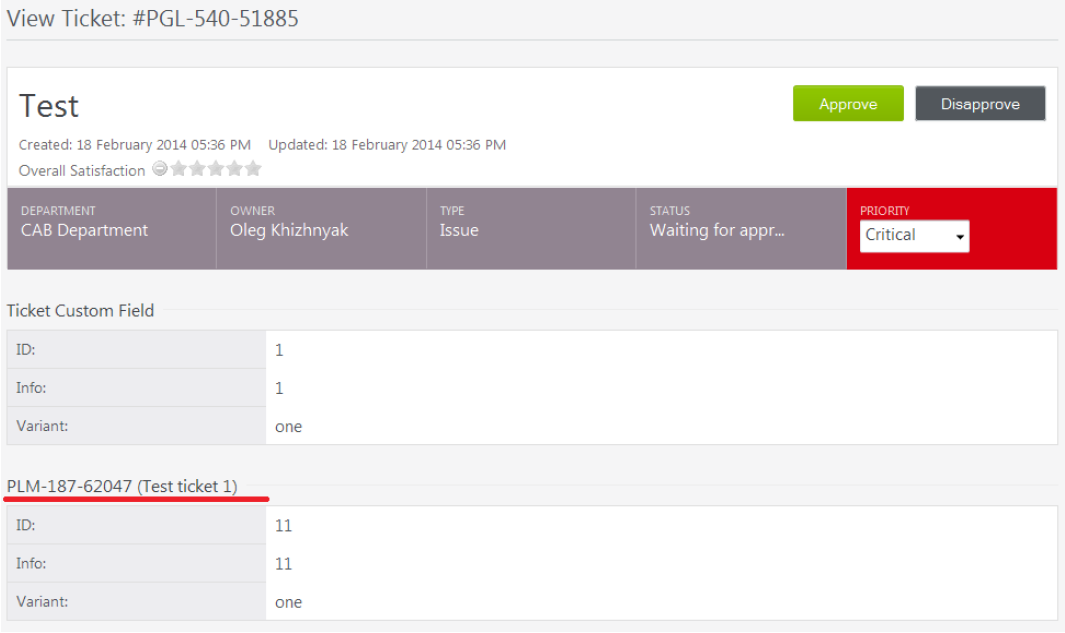 Now (in User CP) we can see the information about ticket attached to this request.
Below you can find the video with the workflow of this module:
Please, check out the demo here:
Staff CP: http://itil.kayakodev.com/staff/
login: admin
pass: 111111


 kayako-solutions