


Assets Module Enhanced
Our brand-new asset management module for Kayako features an extended functionality which allows for a hierarchical arrangement of assets based on a variety of properties, such as type, group, model, status or organization. Moreover, this module lets you create parent-child relationship not only for assets but for organizations, too.
Managing Assets
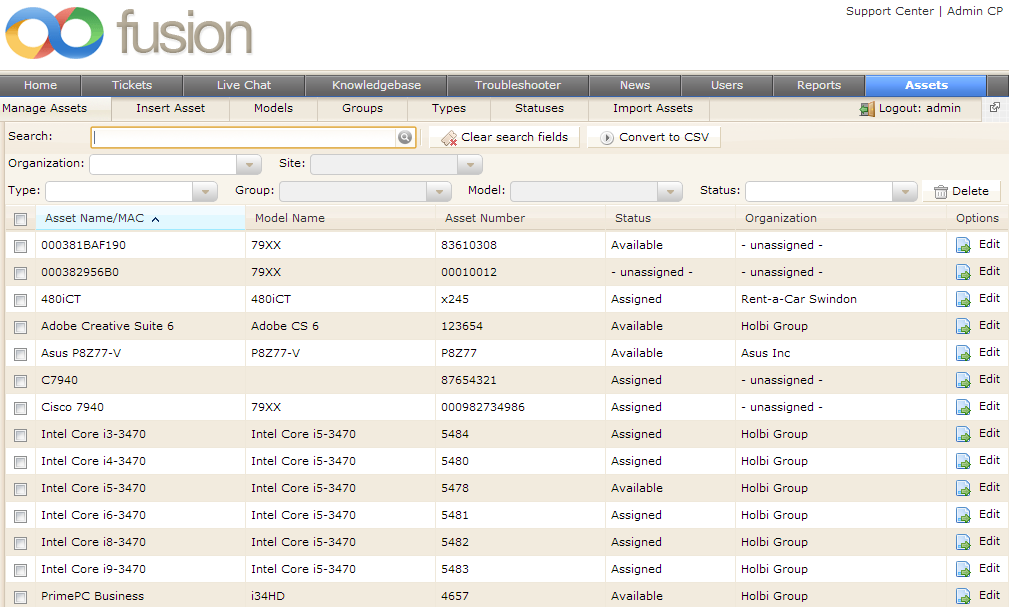
1. Upon installation you will see a new tab in the top navigation bar called Assets. Click on it. Then click on Manage Assets on the left-hand side. Now you should see the main asset management dashboard
shown below.
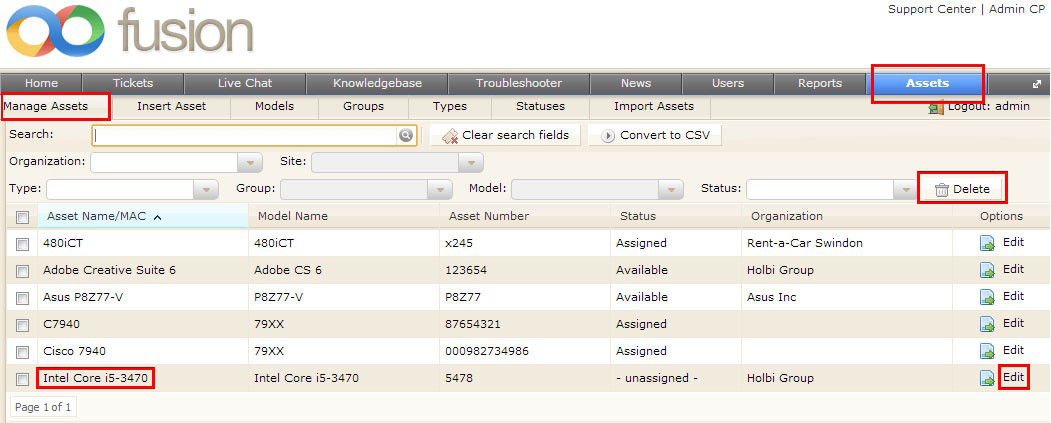
2. Use the Delete button to remove the assets that you’ve chosen by ticking the check-boxes on the left of
any asset in the list.
3. In order to edit assets, click on either Edit or the asset’s name itself. You’ll be presented with all the info related to the asset being edited. You can change information in any of the boxes, however, make sure you click on the Update Asset button to save your changes.
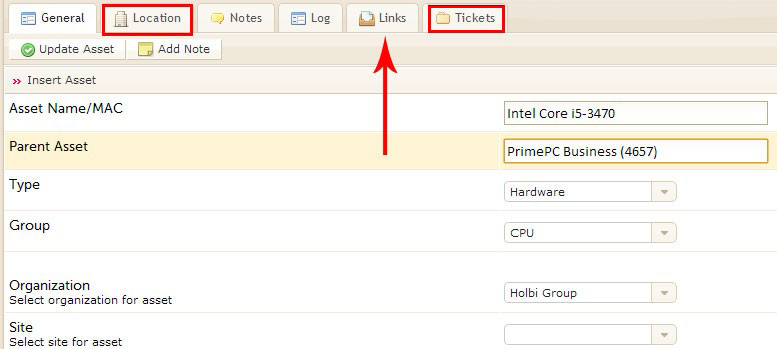
Note: Use the Parent Asset box to assign the asset to another one as its child. The parent-child
relations between assets are shown in the Links tab.
4. Click on Location to edit/view information regarding the asset’s location.
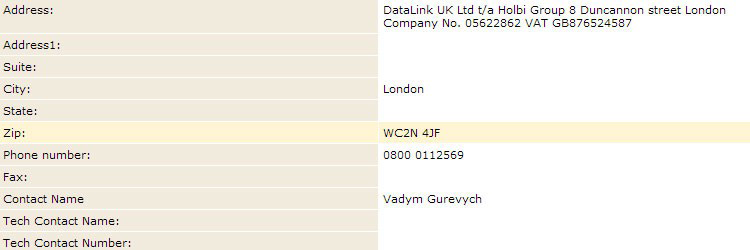
5. When scrolling down the page, you will also see the information about a company, the asset is assigned to if any. This info is only editable from the Manage Organizations page located at Users > Manage Organizations.
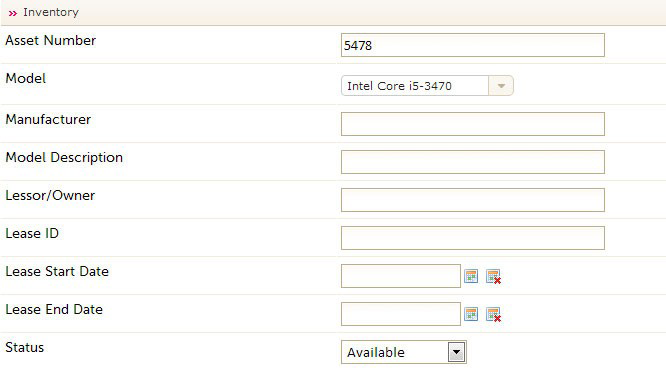
6. Further down the page you can see and edit all the inventory-related data as shown below.
7. Click on Update Asset to save all the changes you’ve made.
Managing Assets in Bulk
1. Select assets you need to manage by ticking their check-boxes. Once ticked, the Mass Action tab appears in a pop-down.
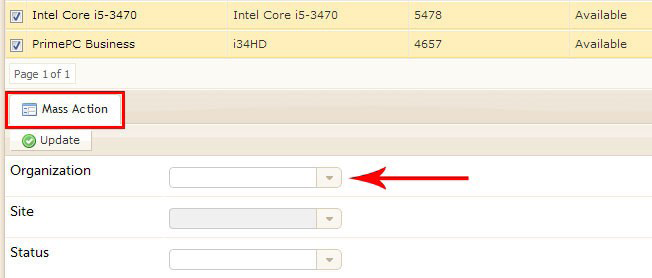
2. You can change either an organization, site or status of the selected assets. Start typing in a box to
trigger an auto-suggest feature or use a drop-down menu to choose a necessary value.
Note: The Site box is available to select only if a chosen organization has a child organization.
The parent-child relationship between organizations are set in the Parent Organization box
located at Users > Manage Organizations > [Organization Name] > Parent Organization.
Using Search Filters
Your asset management dashboard is equipped with powerful search features.
1. Use the top Search box to type in the required asset’s name, or any search query the asset’s name may
contain.
2. You can narrow down your search by filtering your assets based on Organization, Site, Type, Group,
Model and Status.

Note: The Site drop-down is available only after an organization is specified. The Group and Model boxes become available for selection after consecutive filling of the Type and Group boxes, respectively.
3. Use the Clear search fields button to reset your search parameters.
4. Click on Convert to CSV to convert your asset list into a CSV file.
Creating New Assets
Note: Before creating a new asset, you may want to make sure that an appropriate type, group
and model to be assigned to the new asset, are already registered in the system. Otherwise, we
prompt you to go ahead and create these values in the first place starting with Types, then going to Groups and finally to Models. You won’t be able to create a new type, without assigning it to any of the existing groups, and you won’t create a new group without linking it to an existing type.
1. Click on Types, and then on the New button.

2. Specify the type’s name, select its status and enter an optional description in the bottom text area. Click on Insert Type.

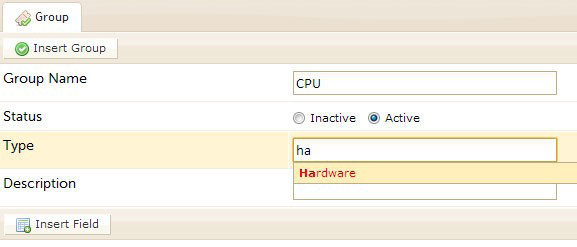
3. Go to Groups now. Click on the New button in the right-hand side of the screen.
4. Specify the group’s name, choose its status and assign a type to it. Just start typing the type’s name and select an appropriate type from a drop-down with auto-suggested options. Do not forget to click Insert Group at the end.
5. Clicking on Insert Field will result in a new ‘custom’ field appearing below. You can select whether this field is a required one or not, by using a drop-down on the right of the field. Use the “bin” icon to delete fields. You can add as many new fields as necessary.

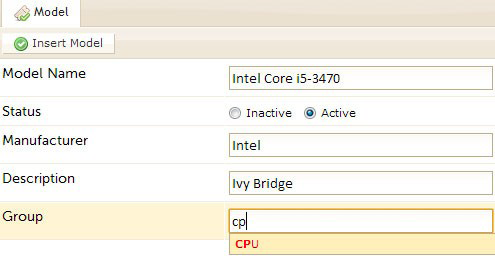
6. Go to Model and click on the New button. Specify the model’s name and fill out the rest of the form. The Group box is required to be filled in. Click on Insert Model.
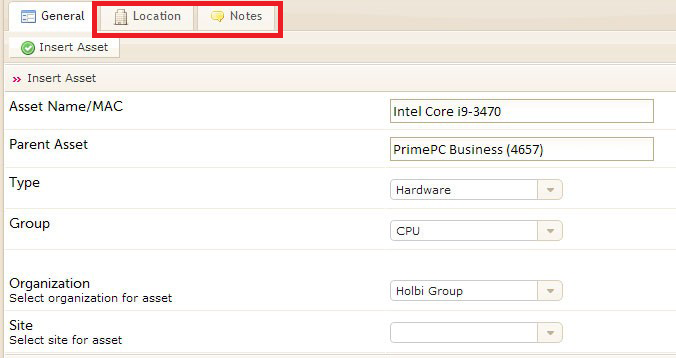
7. Go to Insert Asset and click on the New button. Fill out the asset form. Specify the asset’s parent asset by using an auto-suggest feature when typing in its name if necessary. Use the Location and Notes tabs to enter information about the asset’s location or leave a related note.
Assigning Assets to Users
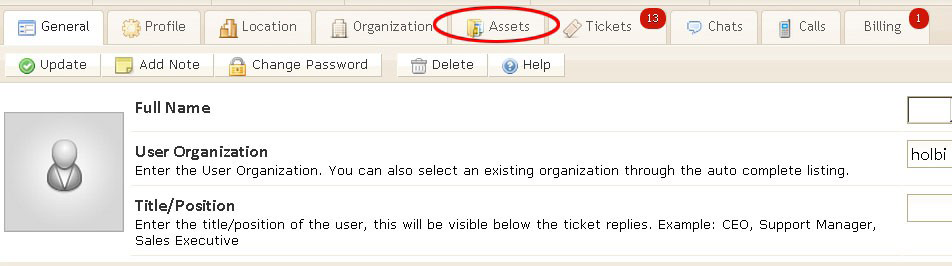
1. Click on Users in the top navigation bar, and then choose Manage Users. From the list of users registered in your system, pick one you want to assign assets to and click on their eMail address. You will see a new Assets tab among the usual user editing options. Click on the tab.
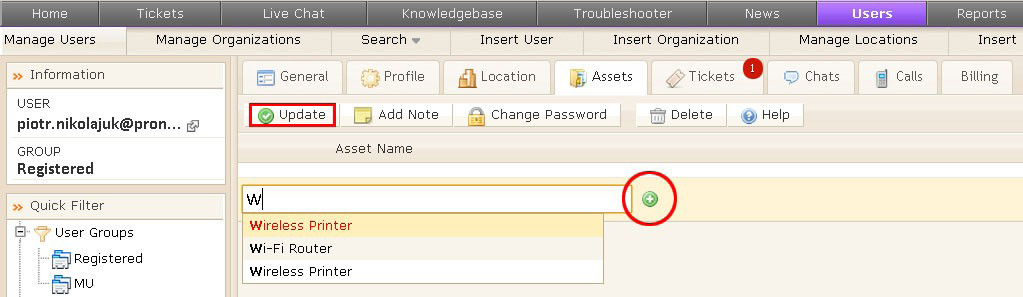
2. Start writing an asset name in the Asset Name/Mac box and you’ll be presented with automated suggestions of the existing assets. Select the one you want to assign to the user and click on the plus icon to the right of the asset search box. Click on the Update button to assign the selected asset to the user.
Assigning Assets to Tickets
Assets can be assigned to a ticket when the ticket is being created. Check out the new Asset Name/Mac search box. Use the search box to choose an asset and assign it to the ticket.

When managing the ticket, there will be a new tab called Asset. Click on it to see what assets are assigned to the ticket.
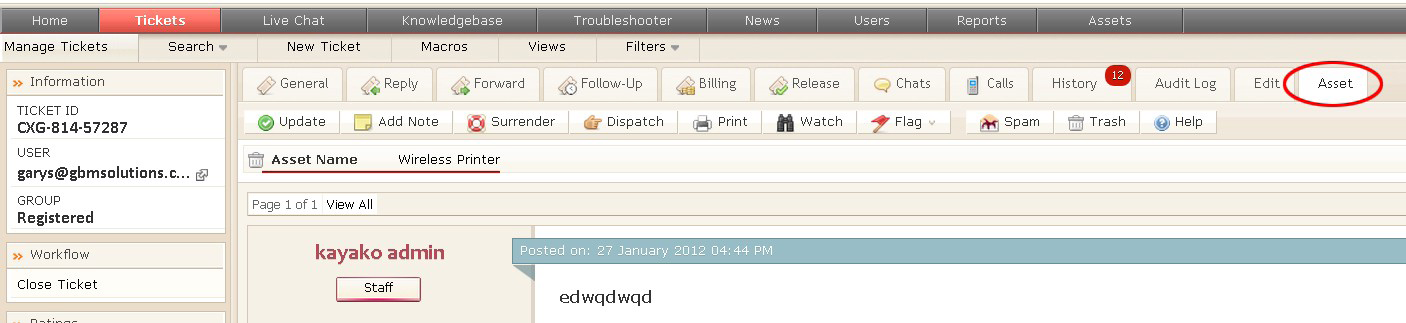
Use the bin icon to the left of the asset name to delete the assets assigned to the ticket being managed.


 kayako-solutions